

In this guide, we'll show you how to send Slack messages directly from your Bolt app. We'll build a user signup flow that automatically posts a notification to your Slack channel whenever a new user registers on your platform. With Bolt and Pica, you can set this up in minutes.
What You'll Build
By the end of this tutorial, you'll have:
- A complete user signup and login system with authentication
- A form collecting user information (name, email, company details, etc.)
- Automatic Slack notifications sent to your team when users sign up
- Beautifully formatted Slack messages with all user details
- Production-ready error handling
Let's get started! 🚀
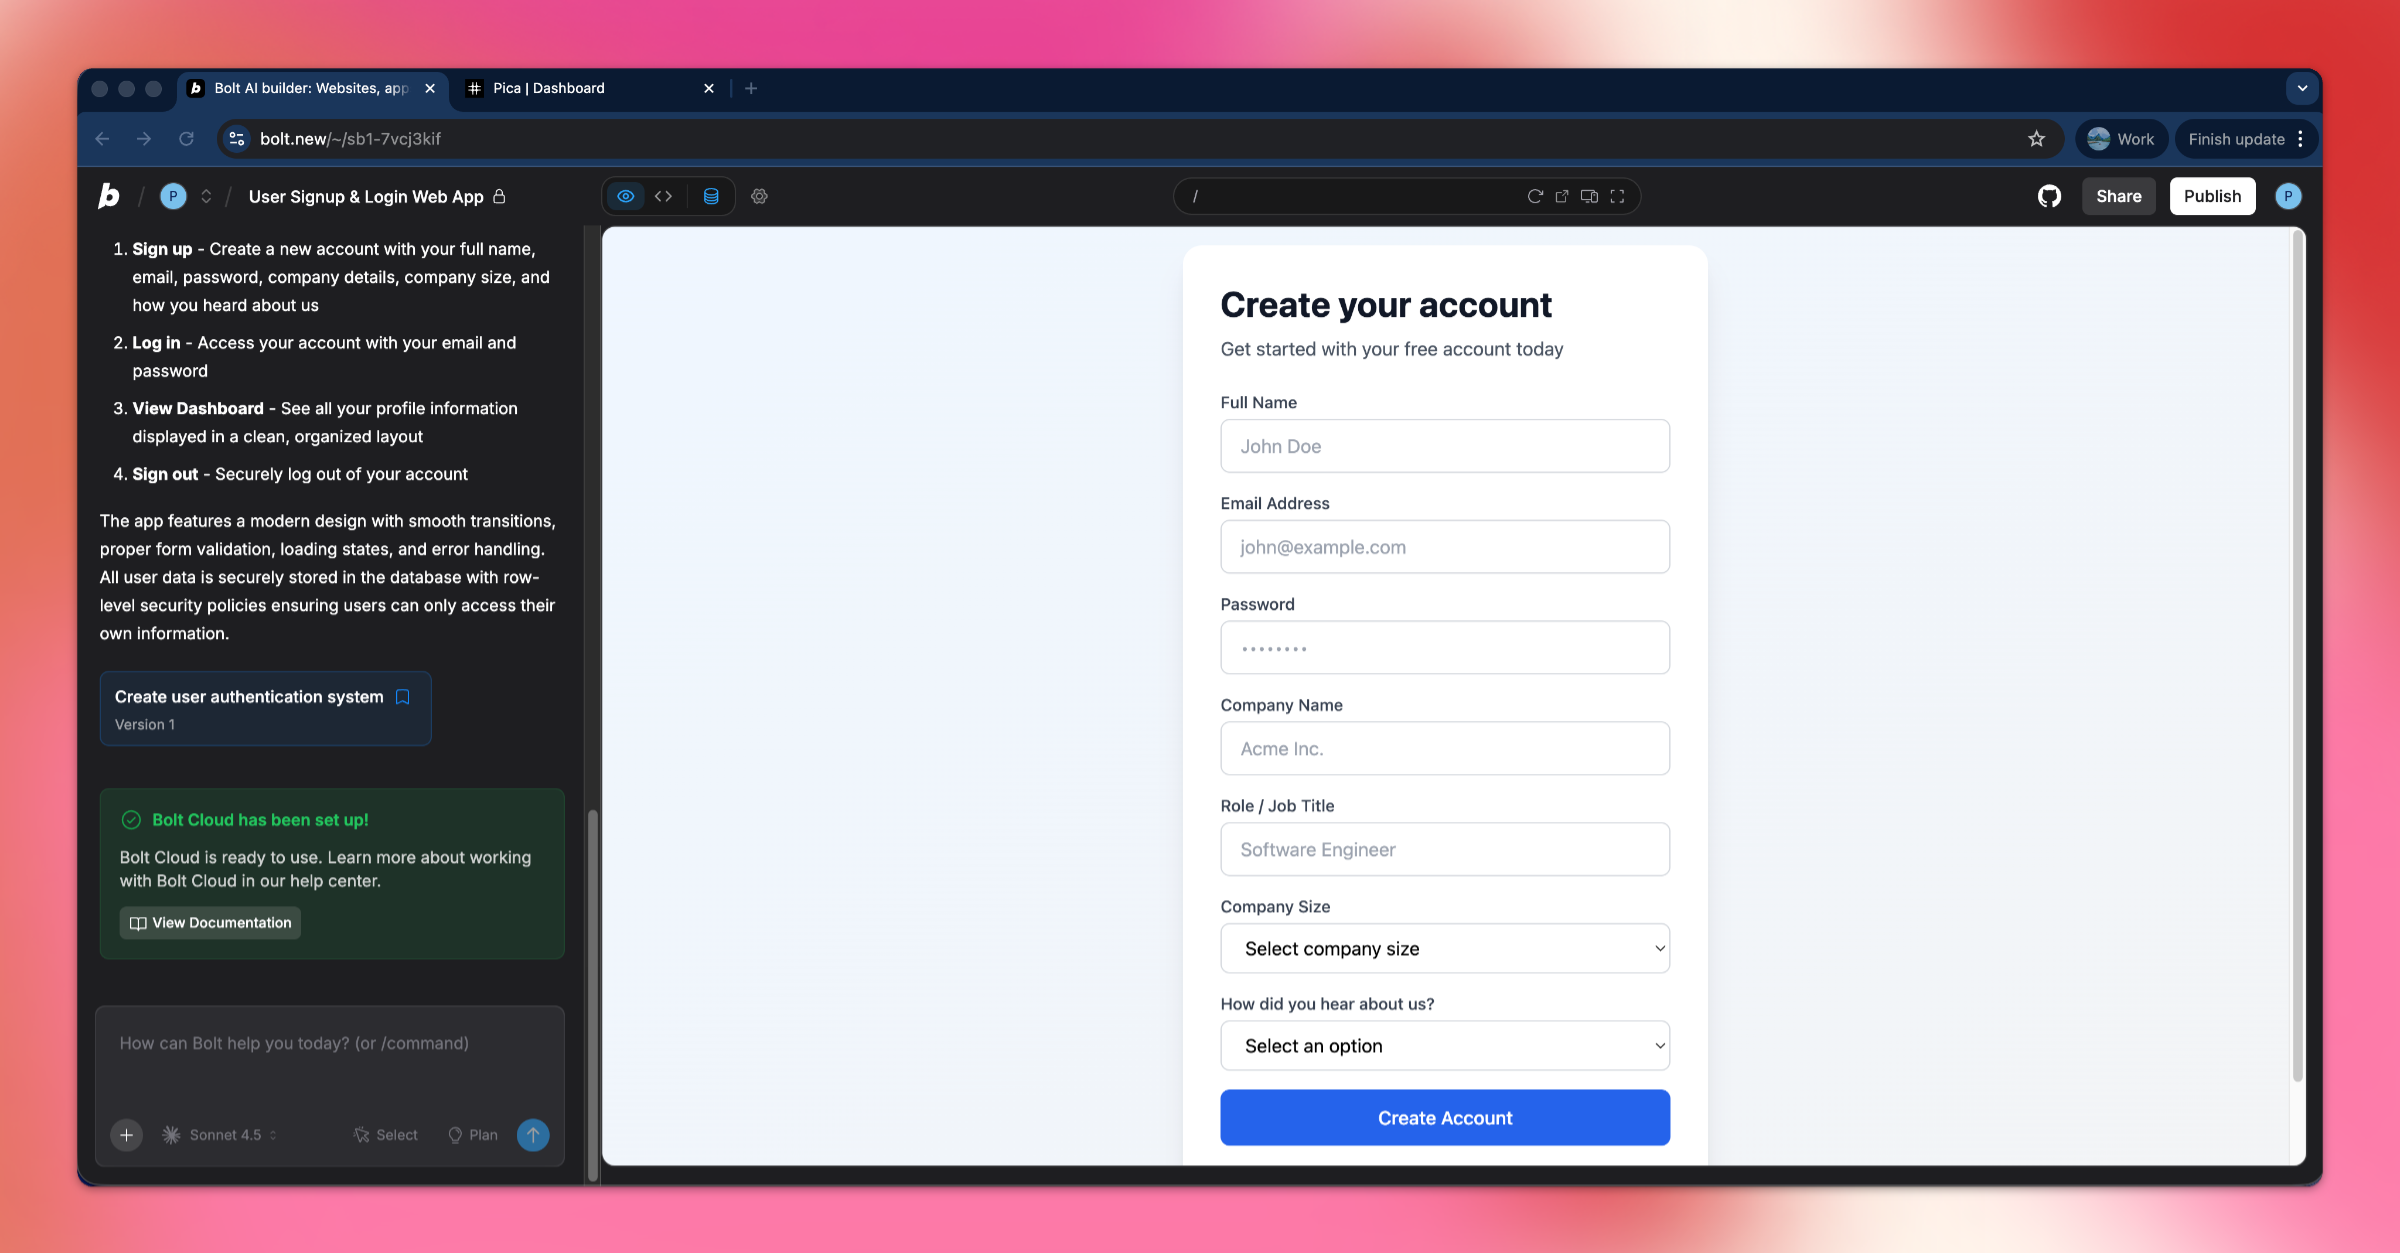
Step 1: Build the User Signup App
First, let's create a web app with user authentication and a comprehensive signup form.
Prompt Bolt:
Build a web app with user signup and login authentication.
On signup, collect the following information from the user:
Basic Information:
- Full name (text input)
- Email address (text input)
- Company name (text input)
- Role / job title (text input)
Company Size (dropdown):
- Just me
- 2–10
- 11–50
- 50+
"How did you hear about us?" (dropdown):
- Twitter / X
- YouTube
- Friend
- Blog
- Other
Step 2: Create a Slack Connection in Pica
You need to connect your Slack workspace to Pica so your app can send messages to your channels.
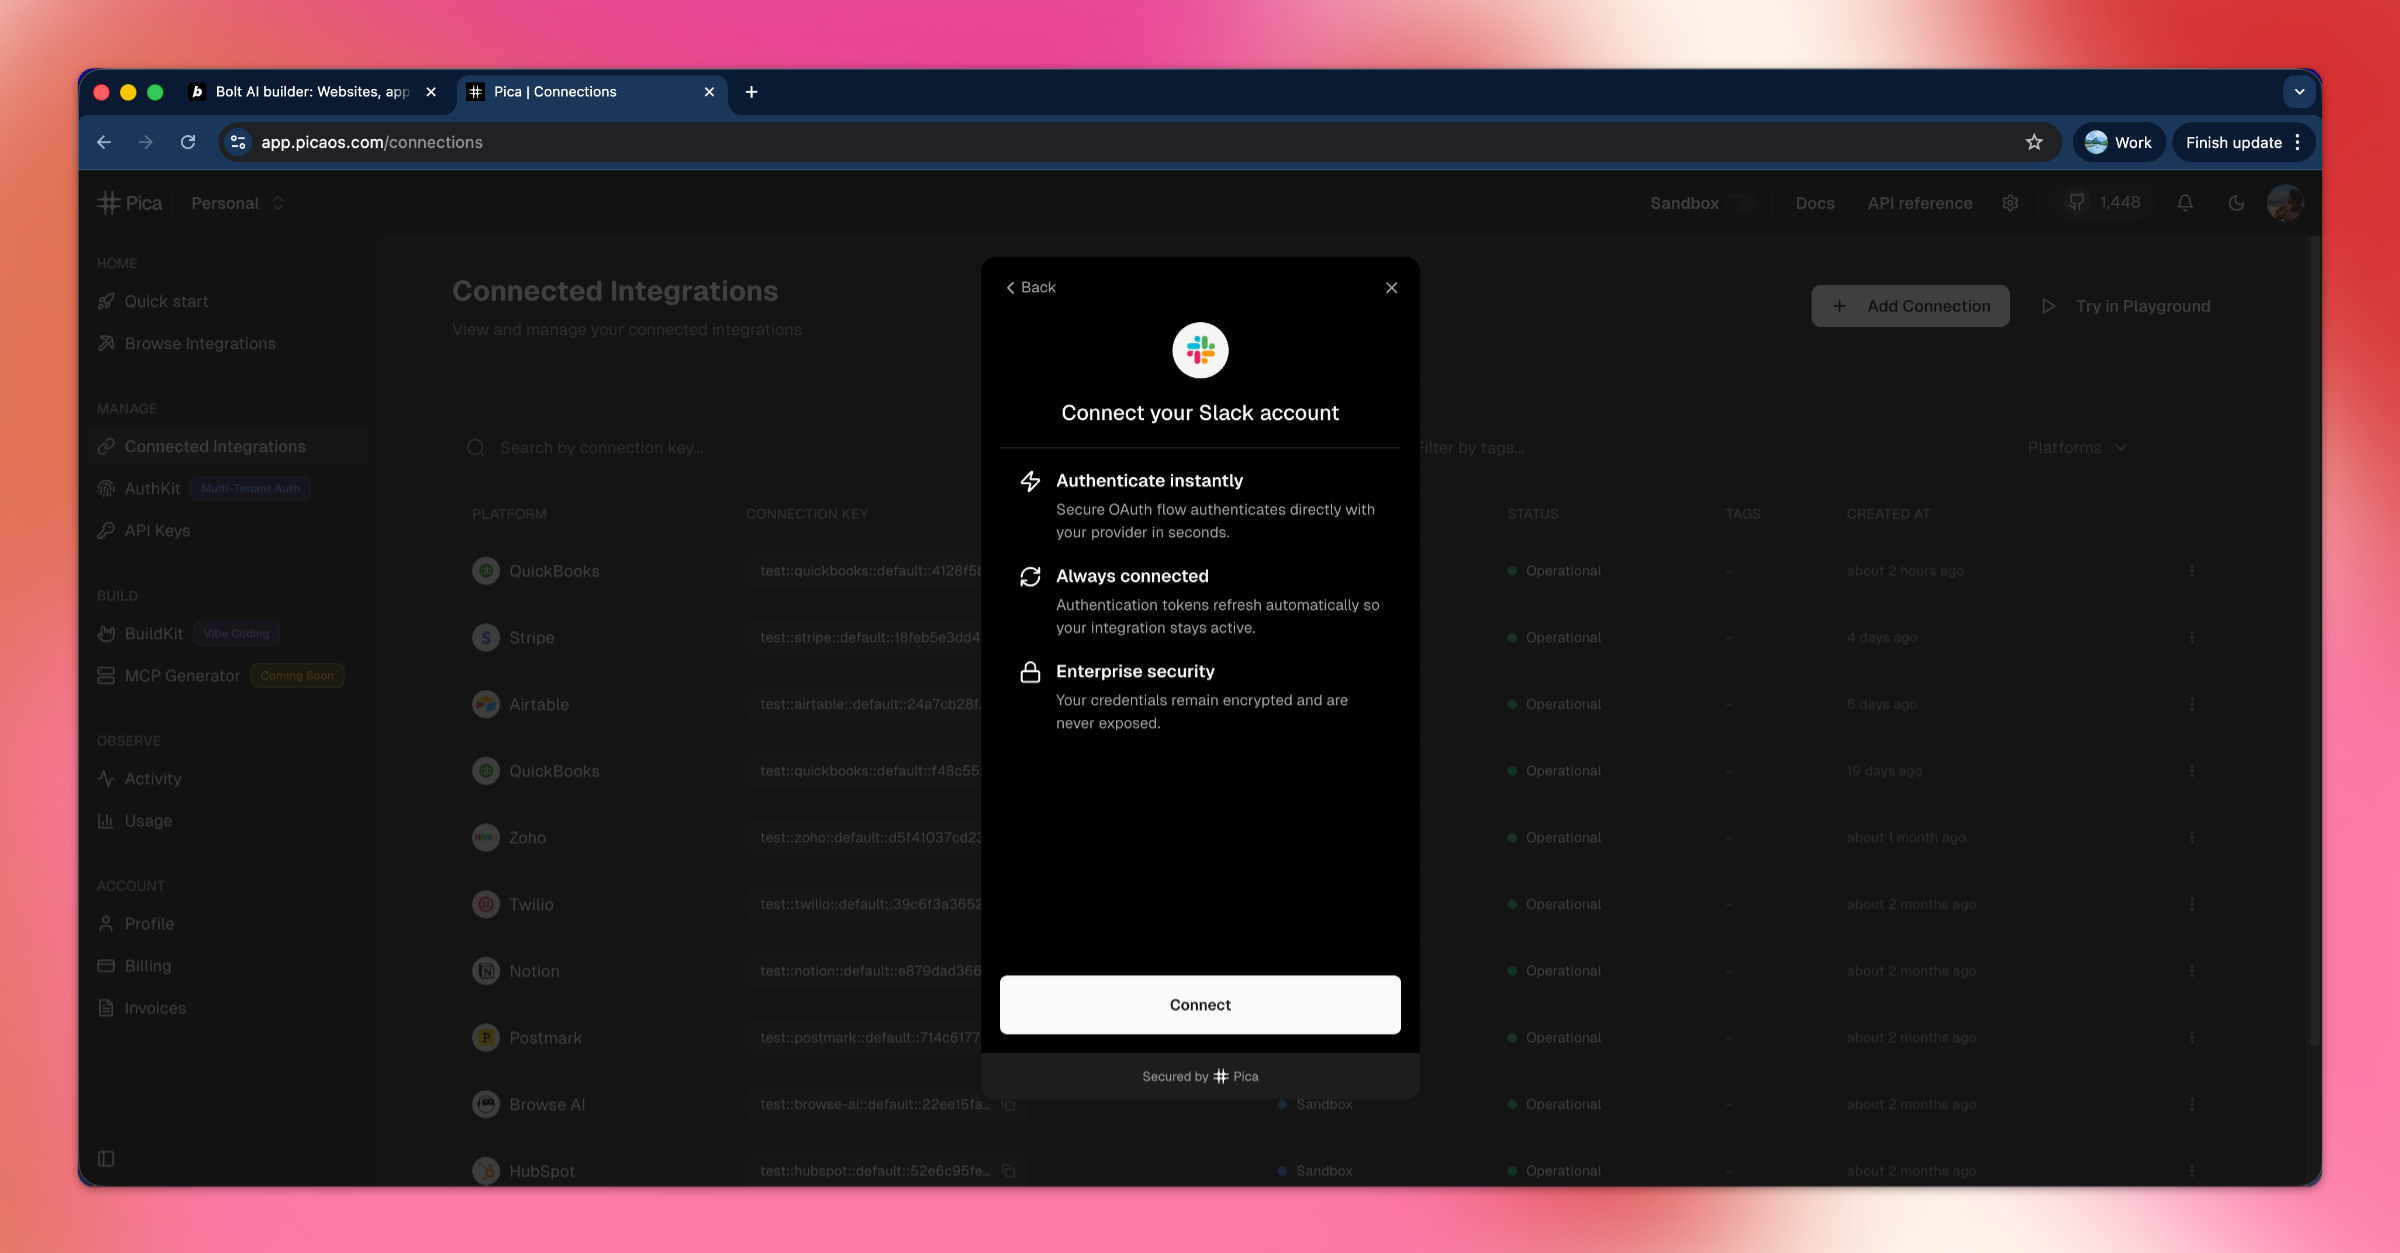
How to Connect Slack:
- Go to the Pica dashboard at: app.picaos.com/connections
- Click on
+ Add Connection - Select
Slackfrom the list of integrations - Authenticate with your Slack workspace
- Grant the necessary permissions for posting messages
- Save your connection key - you'll need this later!
Step 3: Choose Your Slack Channel
To send messages to a specific channel, you can use either the channel name or channel ID—both work!
Option 1: Use Channel Name (Easiest)
Simply use the channel name with a # prefix:
#general#team-notifications#new-signups
This is the simplest approach and works for all public channels and private channels your Slack app has access to.
Option 2: Use Channel ID
If you prefer to use the Channel ID instead:
- Open Slack and navigate to the channel you want to use
- Right-click on the channel name in the sidebar
- Select "View channel details"
- Scroll down to the bottom of the details panel
- Copy the Channel ID (it looks like:
C1234567890)
We recommend using the channel name for simplicity, but keep whichever you choose handy—you'll need it in the next step!
Step 4: Generate Your Code with BuildKit
Now we'll use Pica BuildKit to generate the perfect prompt for posting messages to Slack.
Using BuildKit:
- Go to the BuildKit page at: app.picaos.com/buildkit
- Type: "Post a message in a slack channel"
- BuildKit will generate an optimized prompt for you
Or copy the prompt here:
🚀 Next step: Copy the prompt above and paste it into Bolt.new to create your backend logic!
What BuildKit Does:
BuildKit automatically generates a prompt that includes:
- ✅ Proper API authentication setup
- ✅ Slack message posting with rich formatting
- ✅ Support for blocks and attachments
- ✅ User signup notification formatting
- ✅ Error handling best practices
- ✅ Environment variable configuration
- ✅ Integration with your Pica Slack connection
Simply copy the generated prompt and paste it into Bolt.new to create your backend logic!
Step 5: Add Your Secrets to Bolt
Once Bolt generates your application, you'll need to add your API keys as environment variables.
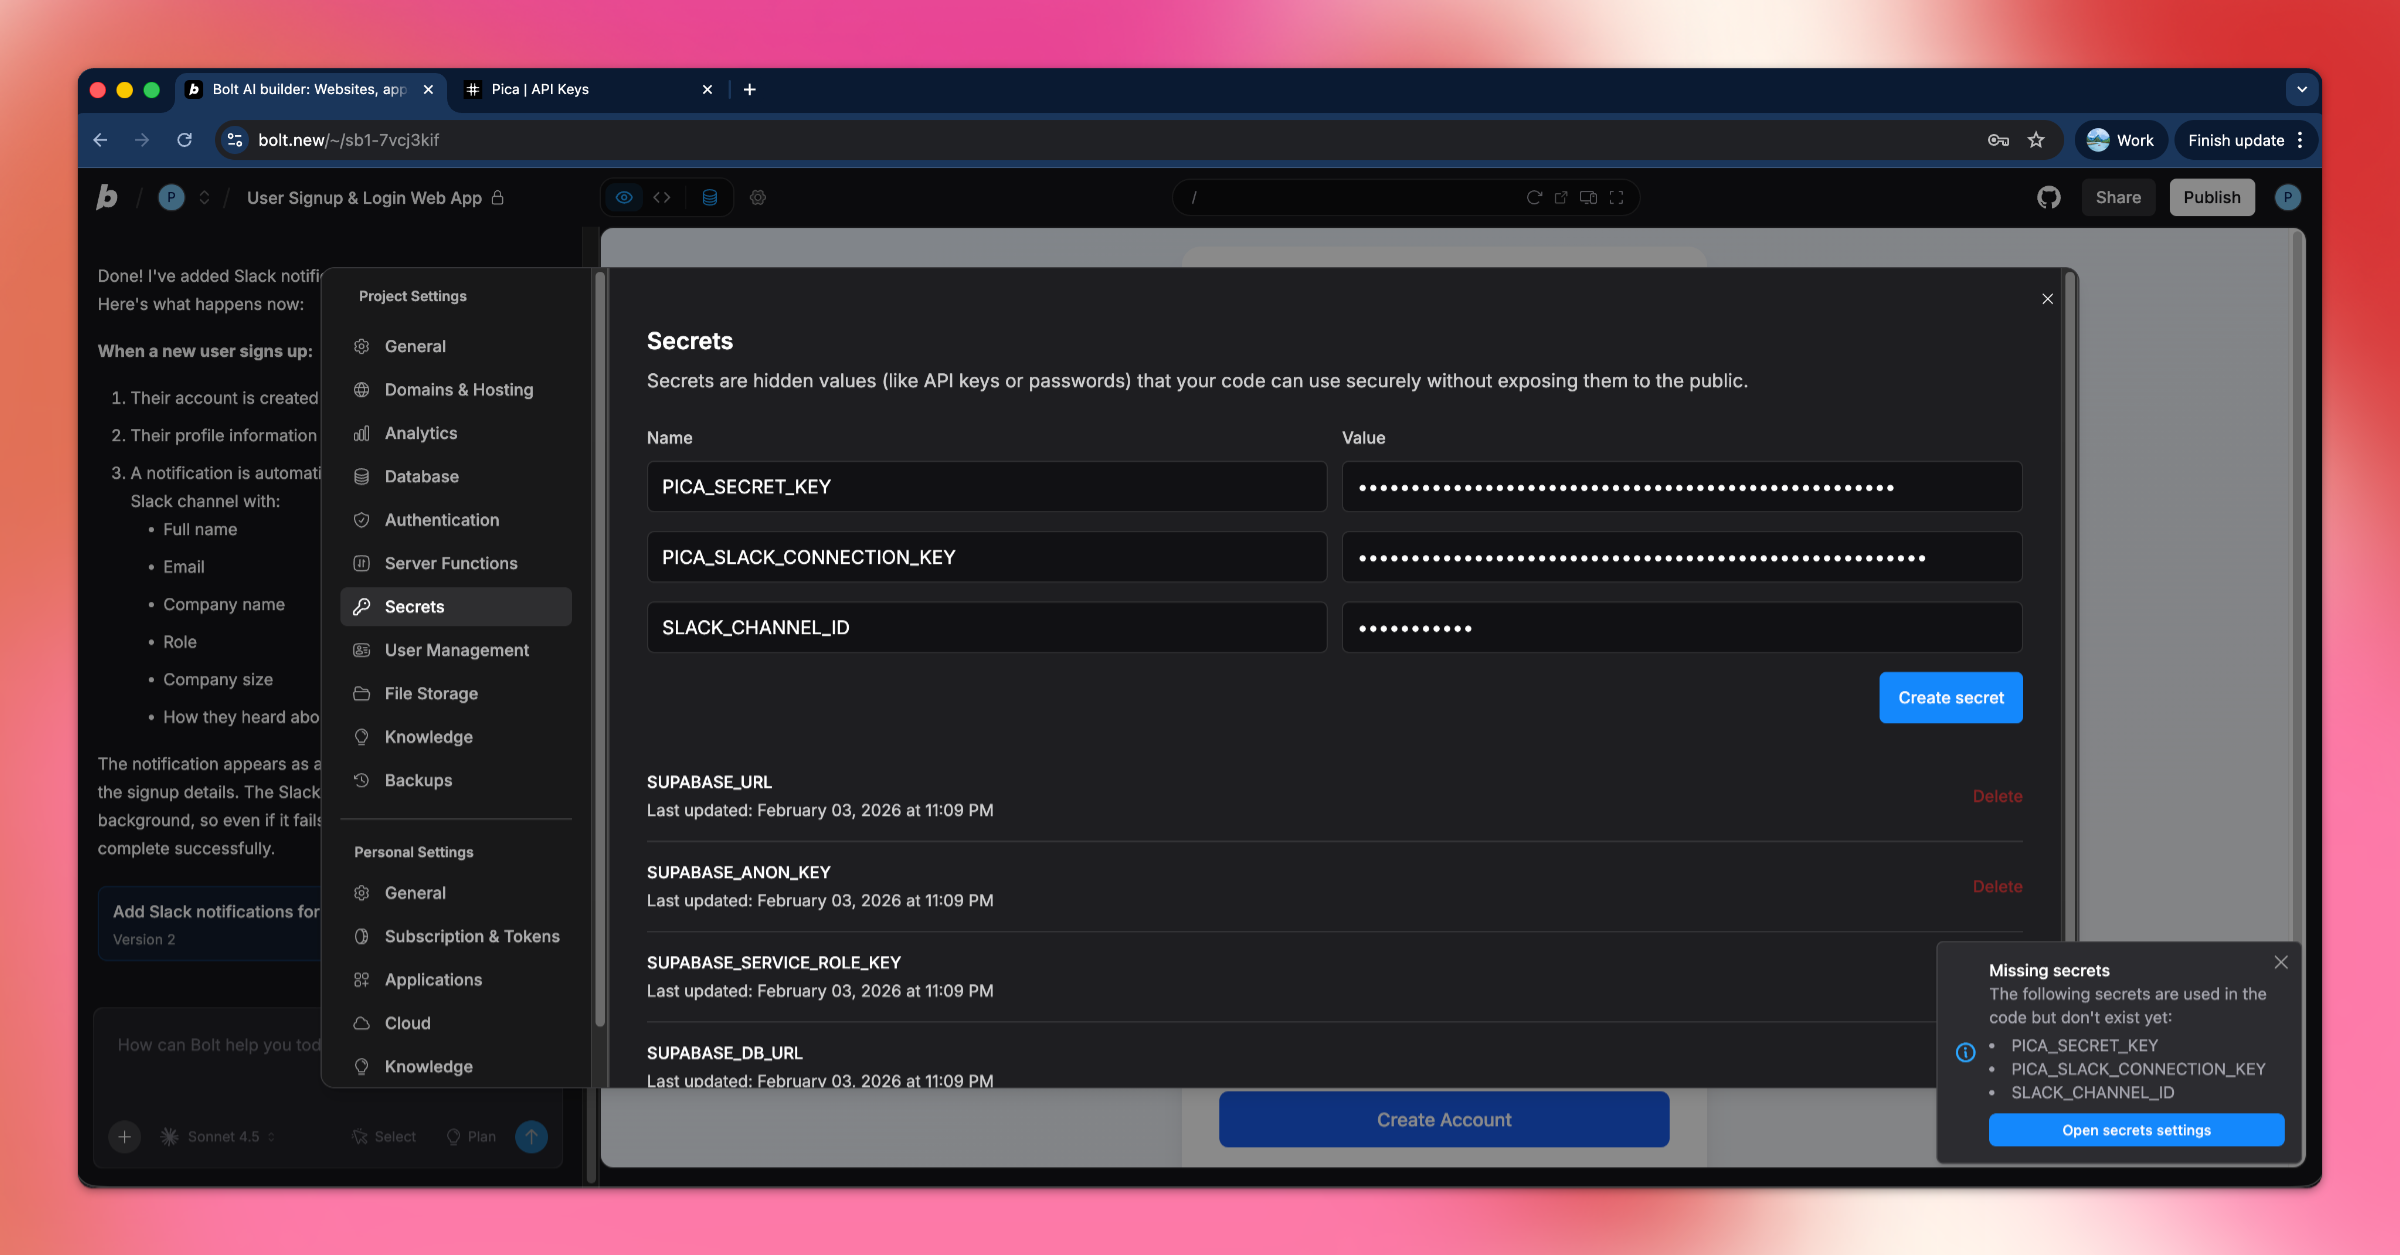
Required Environment Variables:
1. PICA_SECRET_KEY
- Get it from: app.picaos.com/settings/api-keys
- This authenticates your application with Pica
2. PICA_SLACK_CONNECTION_KEY
- Get it from: app.picaos.com/connections
- This is the connection key you saved in Step 2
3. SLACK_CHANNEL_ID
- The channel name or ID from Step 3 (e.g.,
#generalorC1234567890) - This determines which channel receives the notifications
How to Add Secrets in Bolt:
- Click on the Settings icon in Bolt
- Navigate to Secrets
- Add all three keys with their respective values
- Save and restart your application
Now your app will automatically send Slack notifications when users sign up! 🎉
Step 6: Try It in Action!
Test your signup flow and watch the magic happen in Slack!
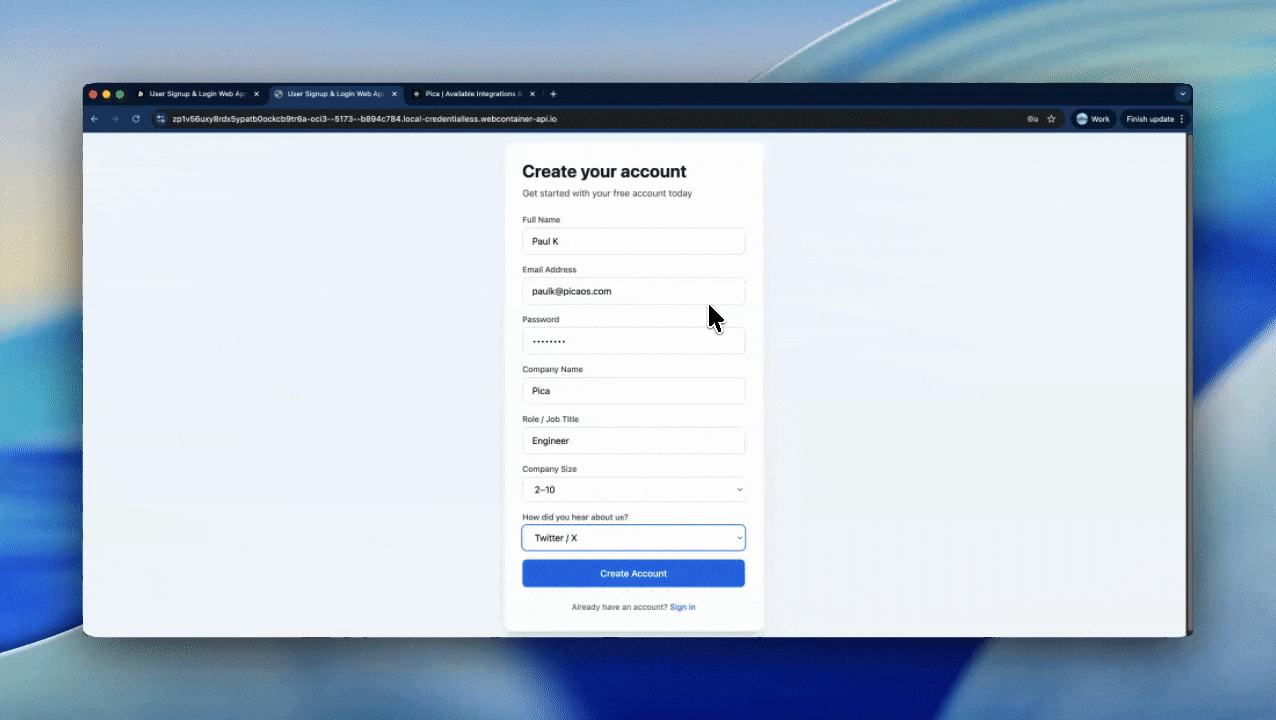
What Happens:
- A new user fills out the signup form with their information
- Upon successful registration, your app triggers a Slack notification
- Your team receives a beautifully formatted message in the designated channel
- The message includes all user details: name, email, company, role, company size, and how they heard about you
Troubleshooting
Slack messages not sending?
- Check your environment variables - Make sure all three keys are set correctly in your Bolt secret settings
- Verify your Slack connection - Go to app.picaos.com/connections and ensure it's active
- Check channel ID - Ensure you're using the correct Channel ID or name
- Verify bot permissions - Make sure your Slack app has permission to post in the channel
- Check Pica logs - View execution logs in your Pica dashboard
Get Help
Questions or need support?
- 📅 Schedule a call with our team
- 📚 Check out the Pica documentation
- 🎥 Watch our video tutorials
Happy building! 🚀