

In this guide, we'll build a waitlist signup page that saves entries directly to a Notion database. With Bolt and Pica, you can create a beautiful signup form in minutes—using Notion as your backend database.
What You'll Build
By the end of this tutorial, you'll have:
- A minimal, beautiful waitlist signup page
- Form fields for name and email
- Direct integration with your Notion database
- Production-ready error handling
Let's get started! 🚀
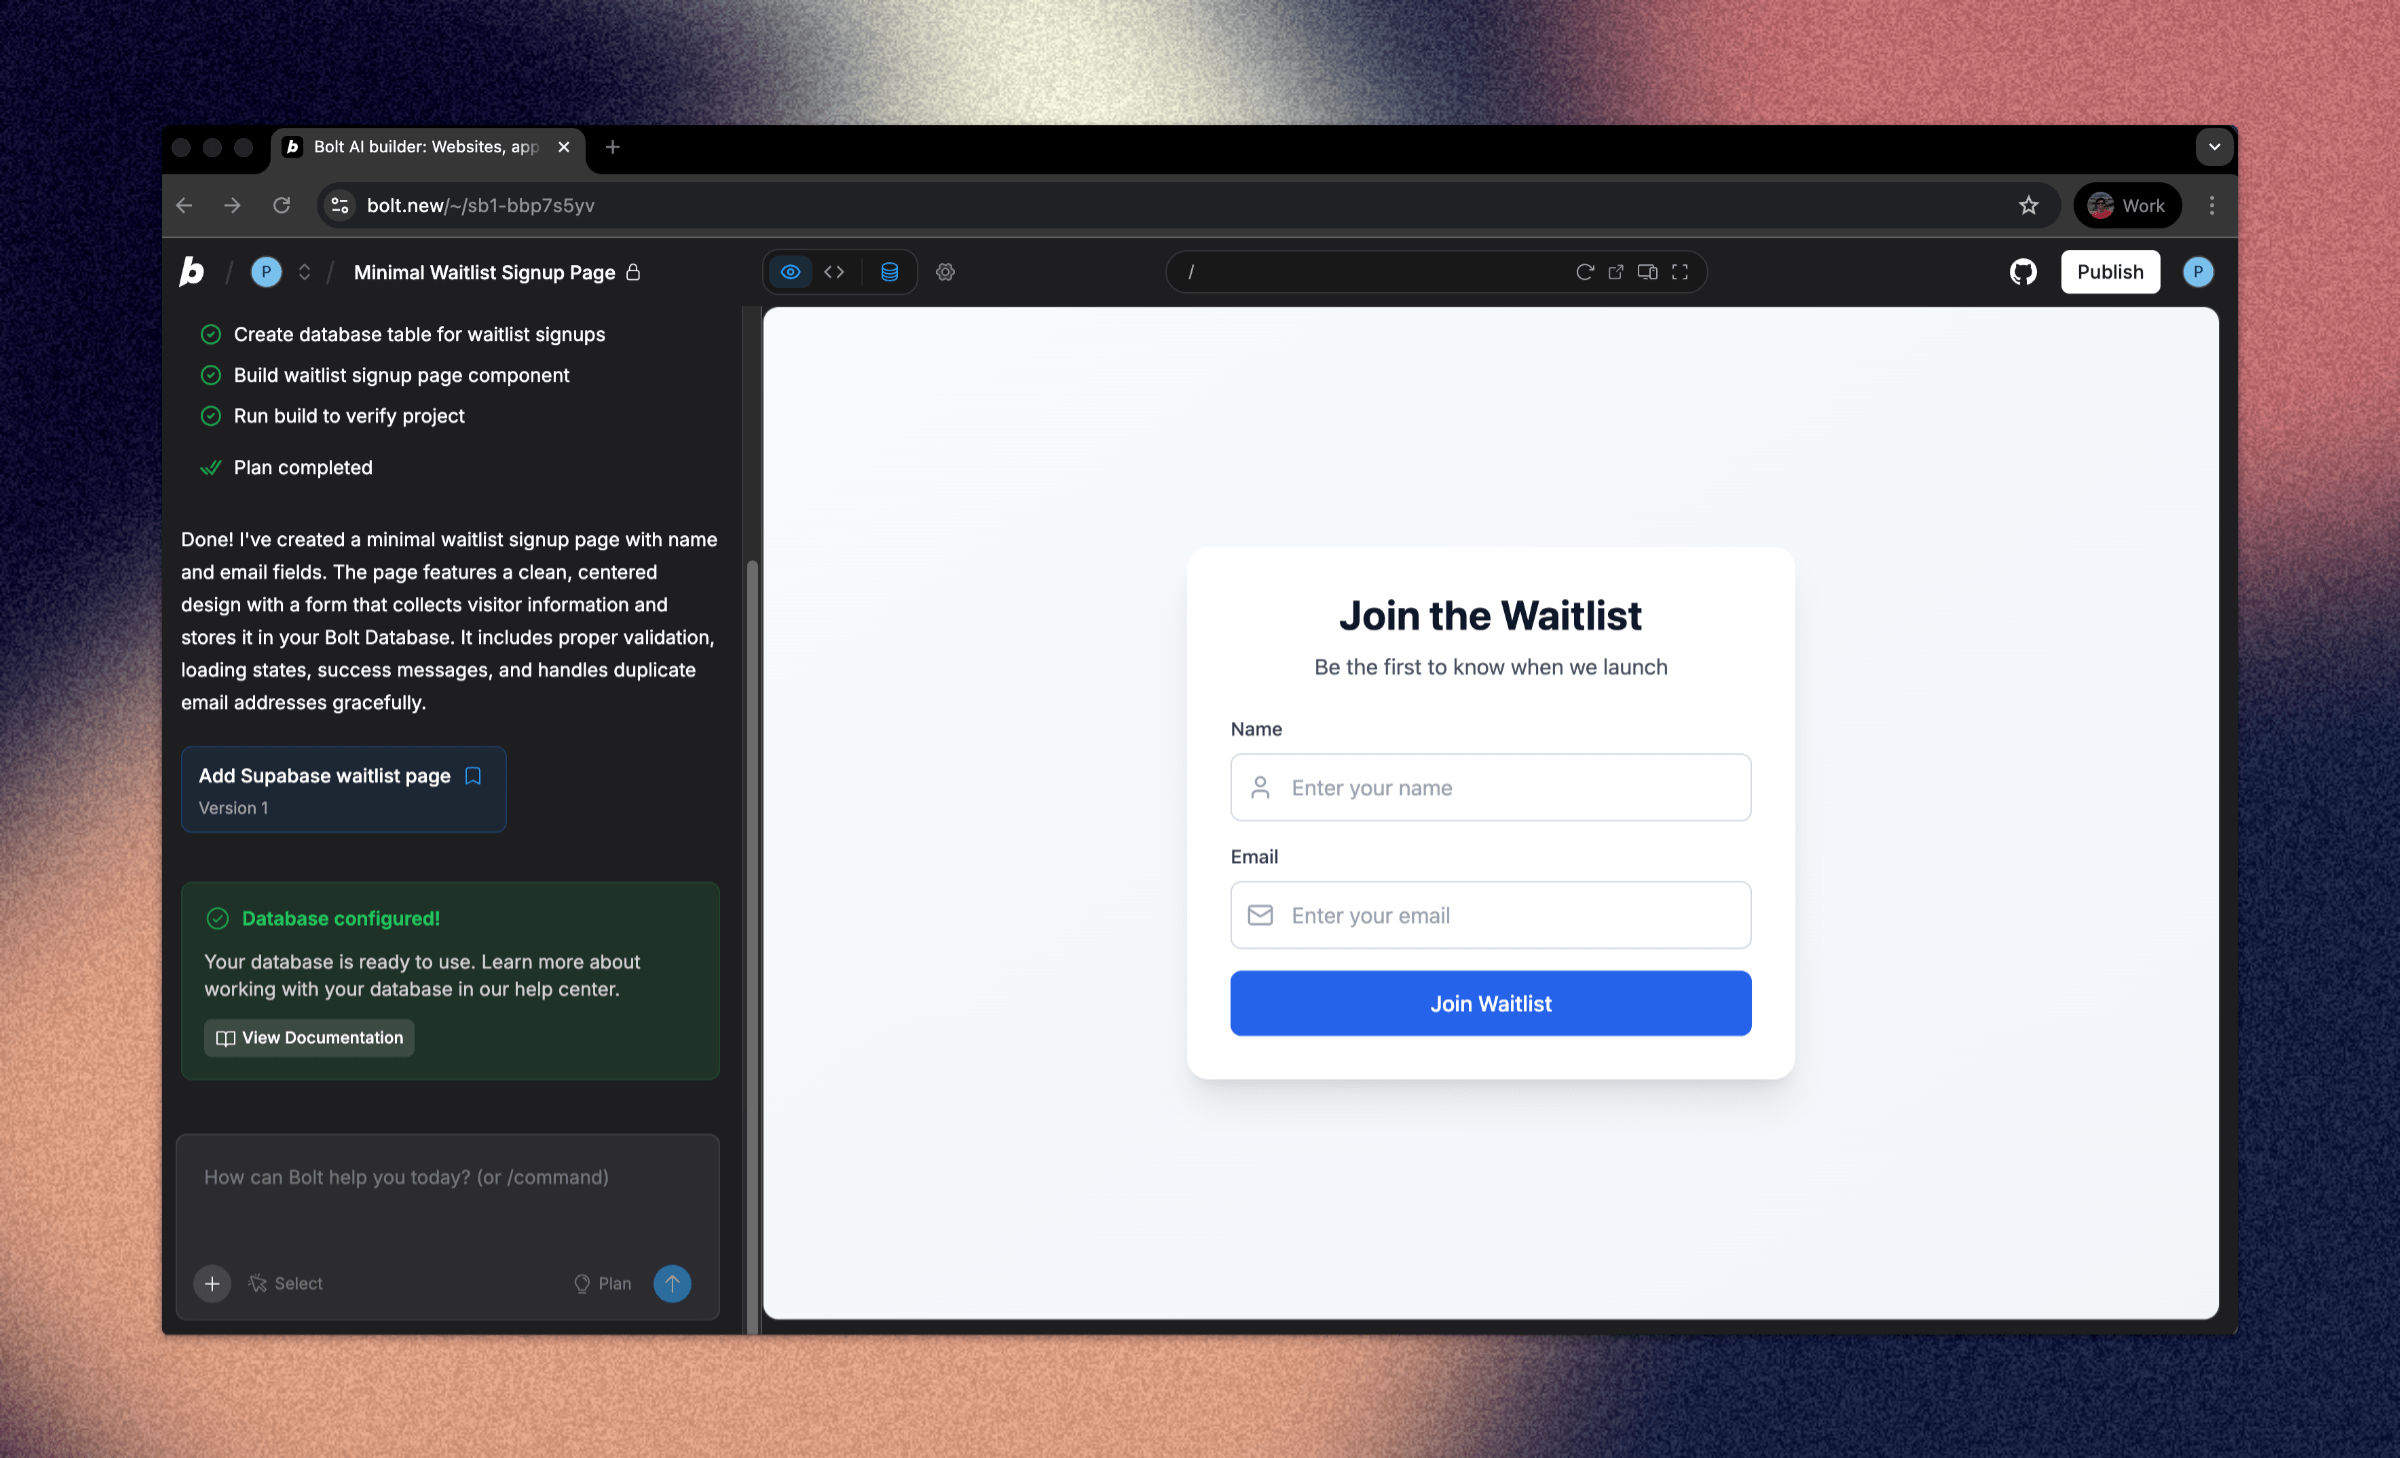
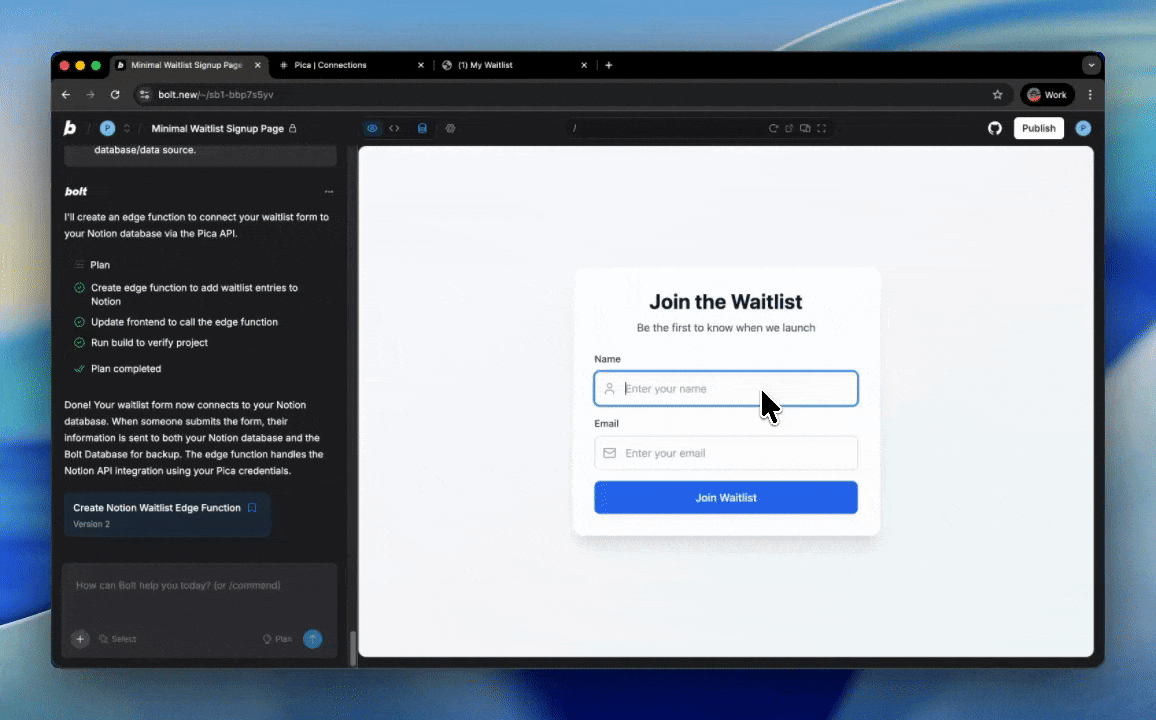
Step 1: Build the Waitlist UI
First, let's create a clean, minimal waitlist signup page.
Prompt Bolt:
"Build me a minimal waitlist signup page UI with fields for name and email address"
Bolt will generate a beautiful, responsive signup form with proper validation and styling.
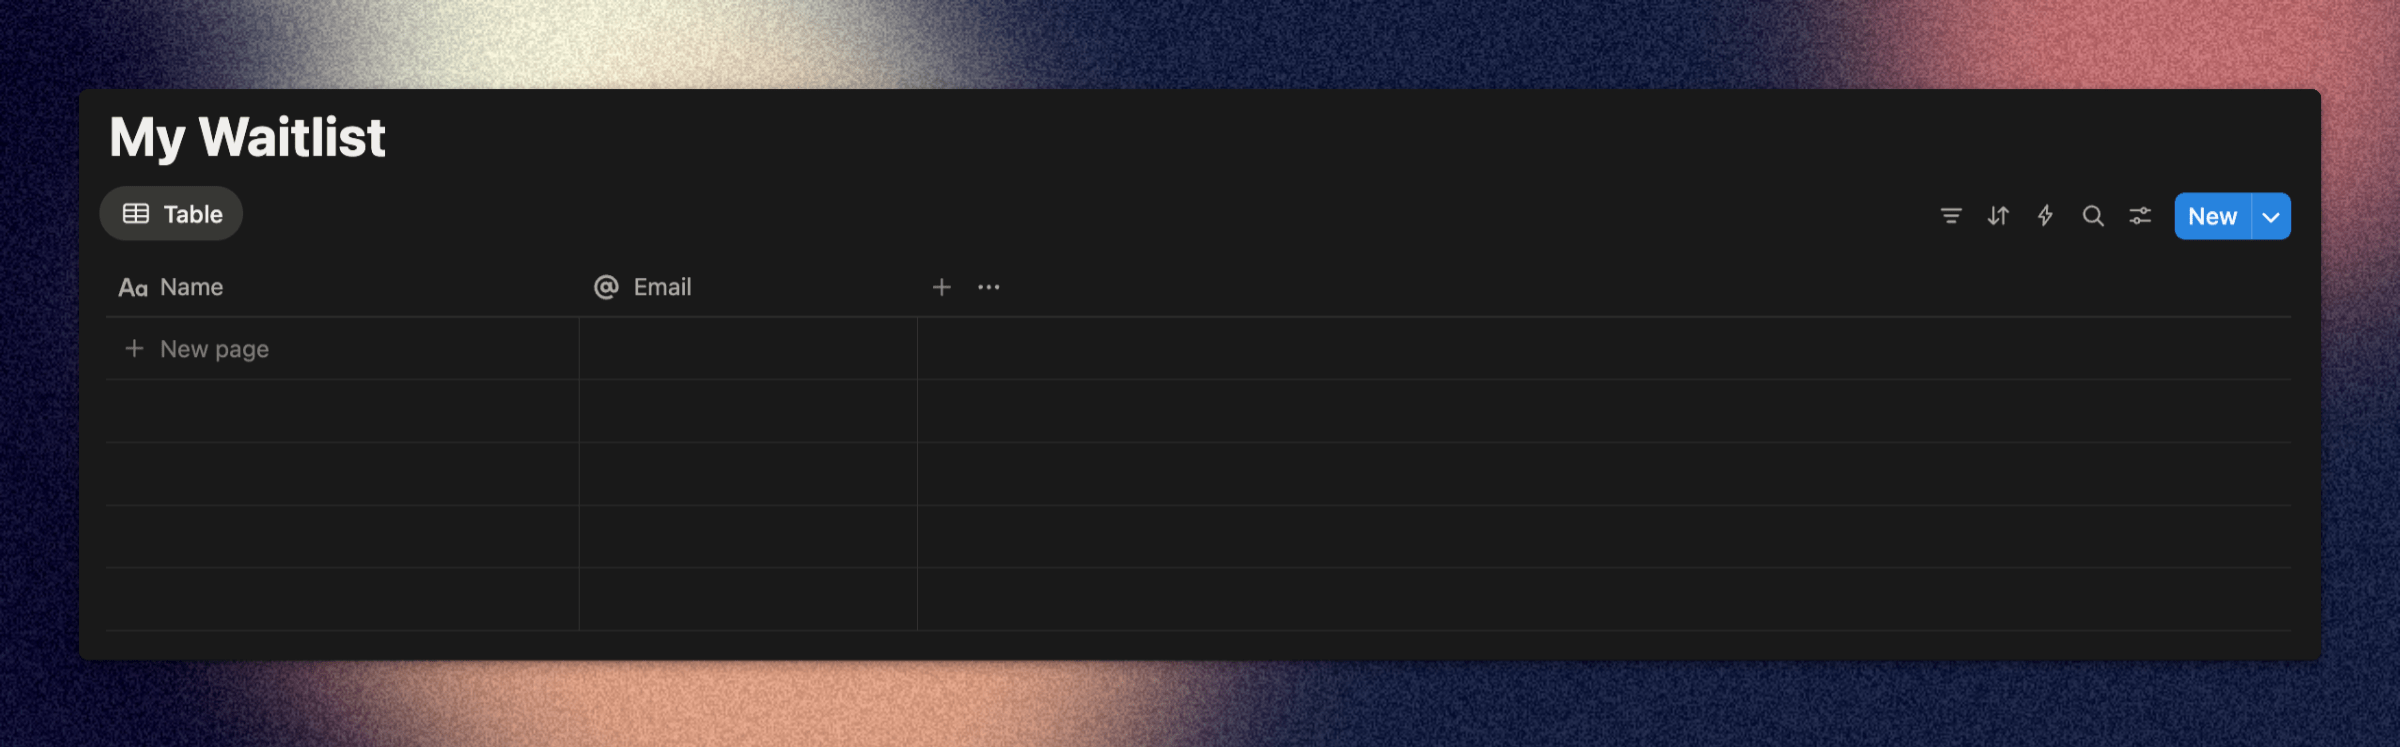
Step 2: Create a Database in Notion
Now let's set up your Notion database to store waitlist entries.
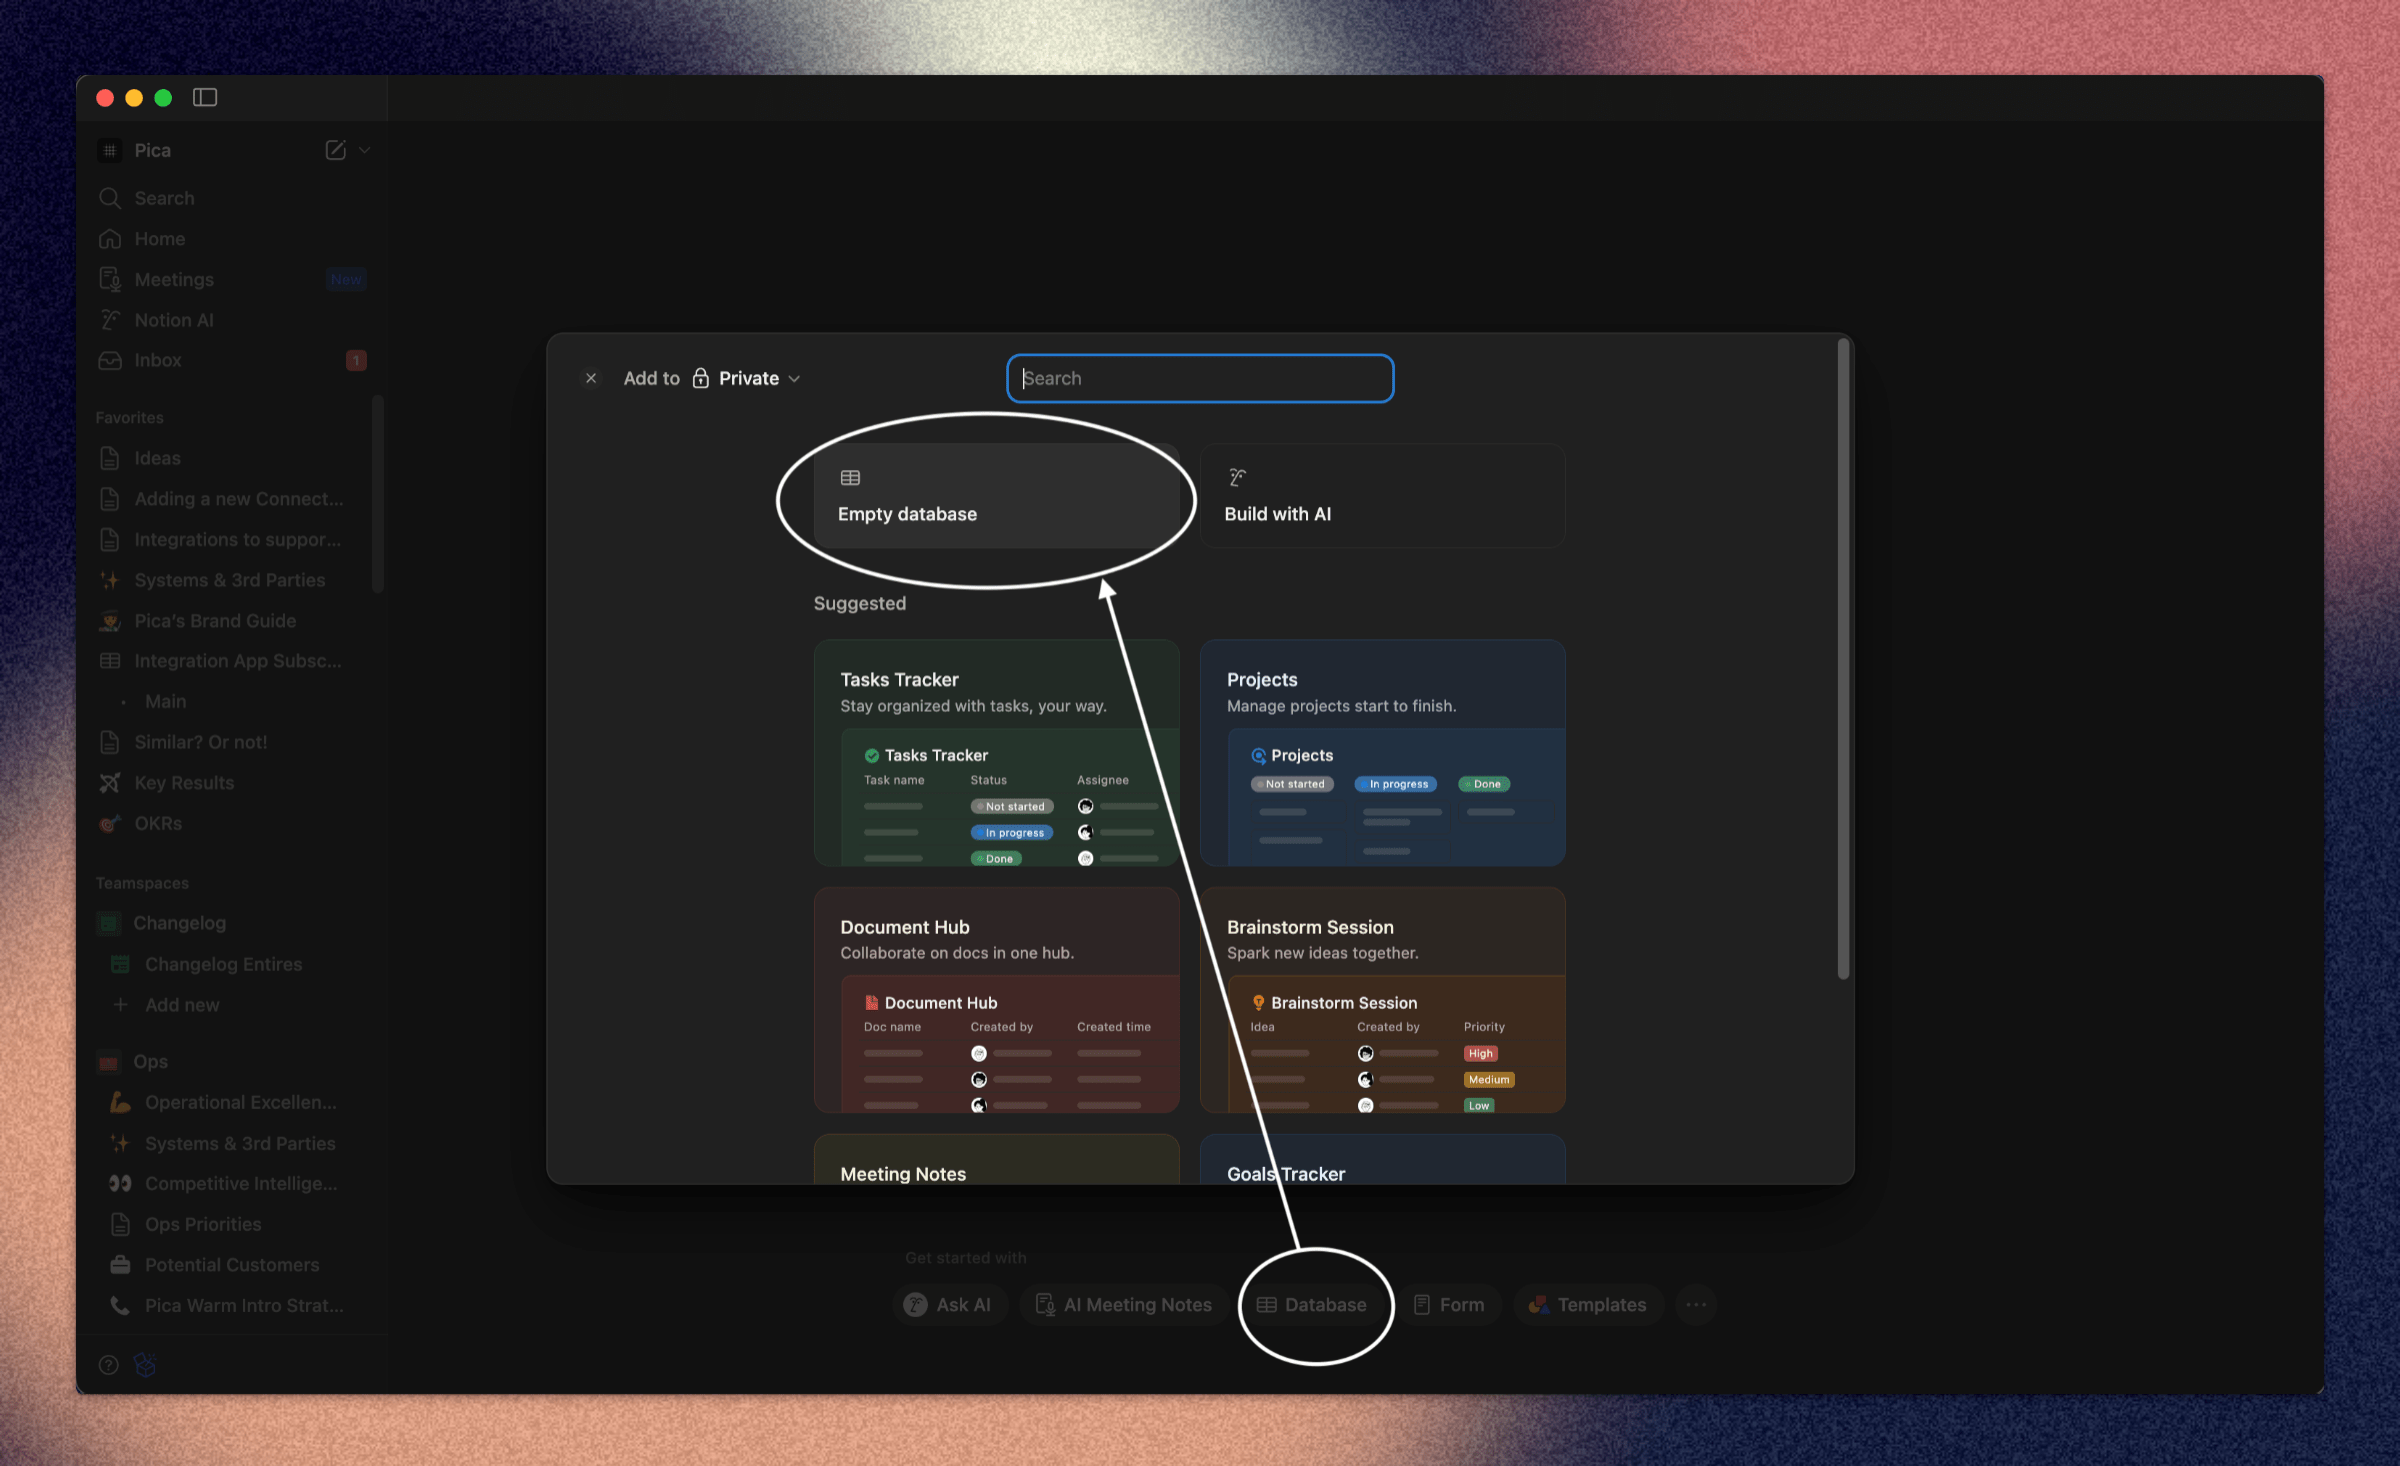
Creating Your Database:
- Go to Notion and create a new page
- Create a new database (table view works great)
- Add these columns:
- Name (Title) - The person's name
- Email (Email) - Their email address
Step 3: Create a Notion Connection in Pica
You need to connect your Notion account to Pica so your waitlist form can add entries to your database.
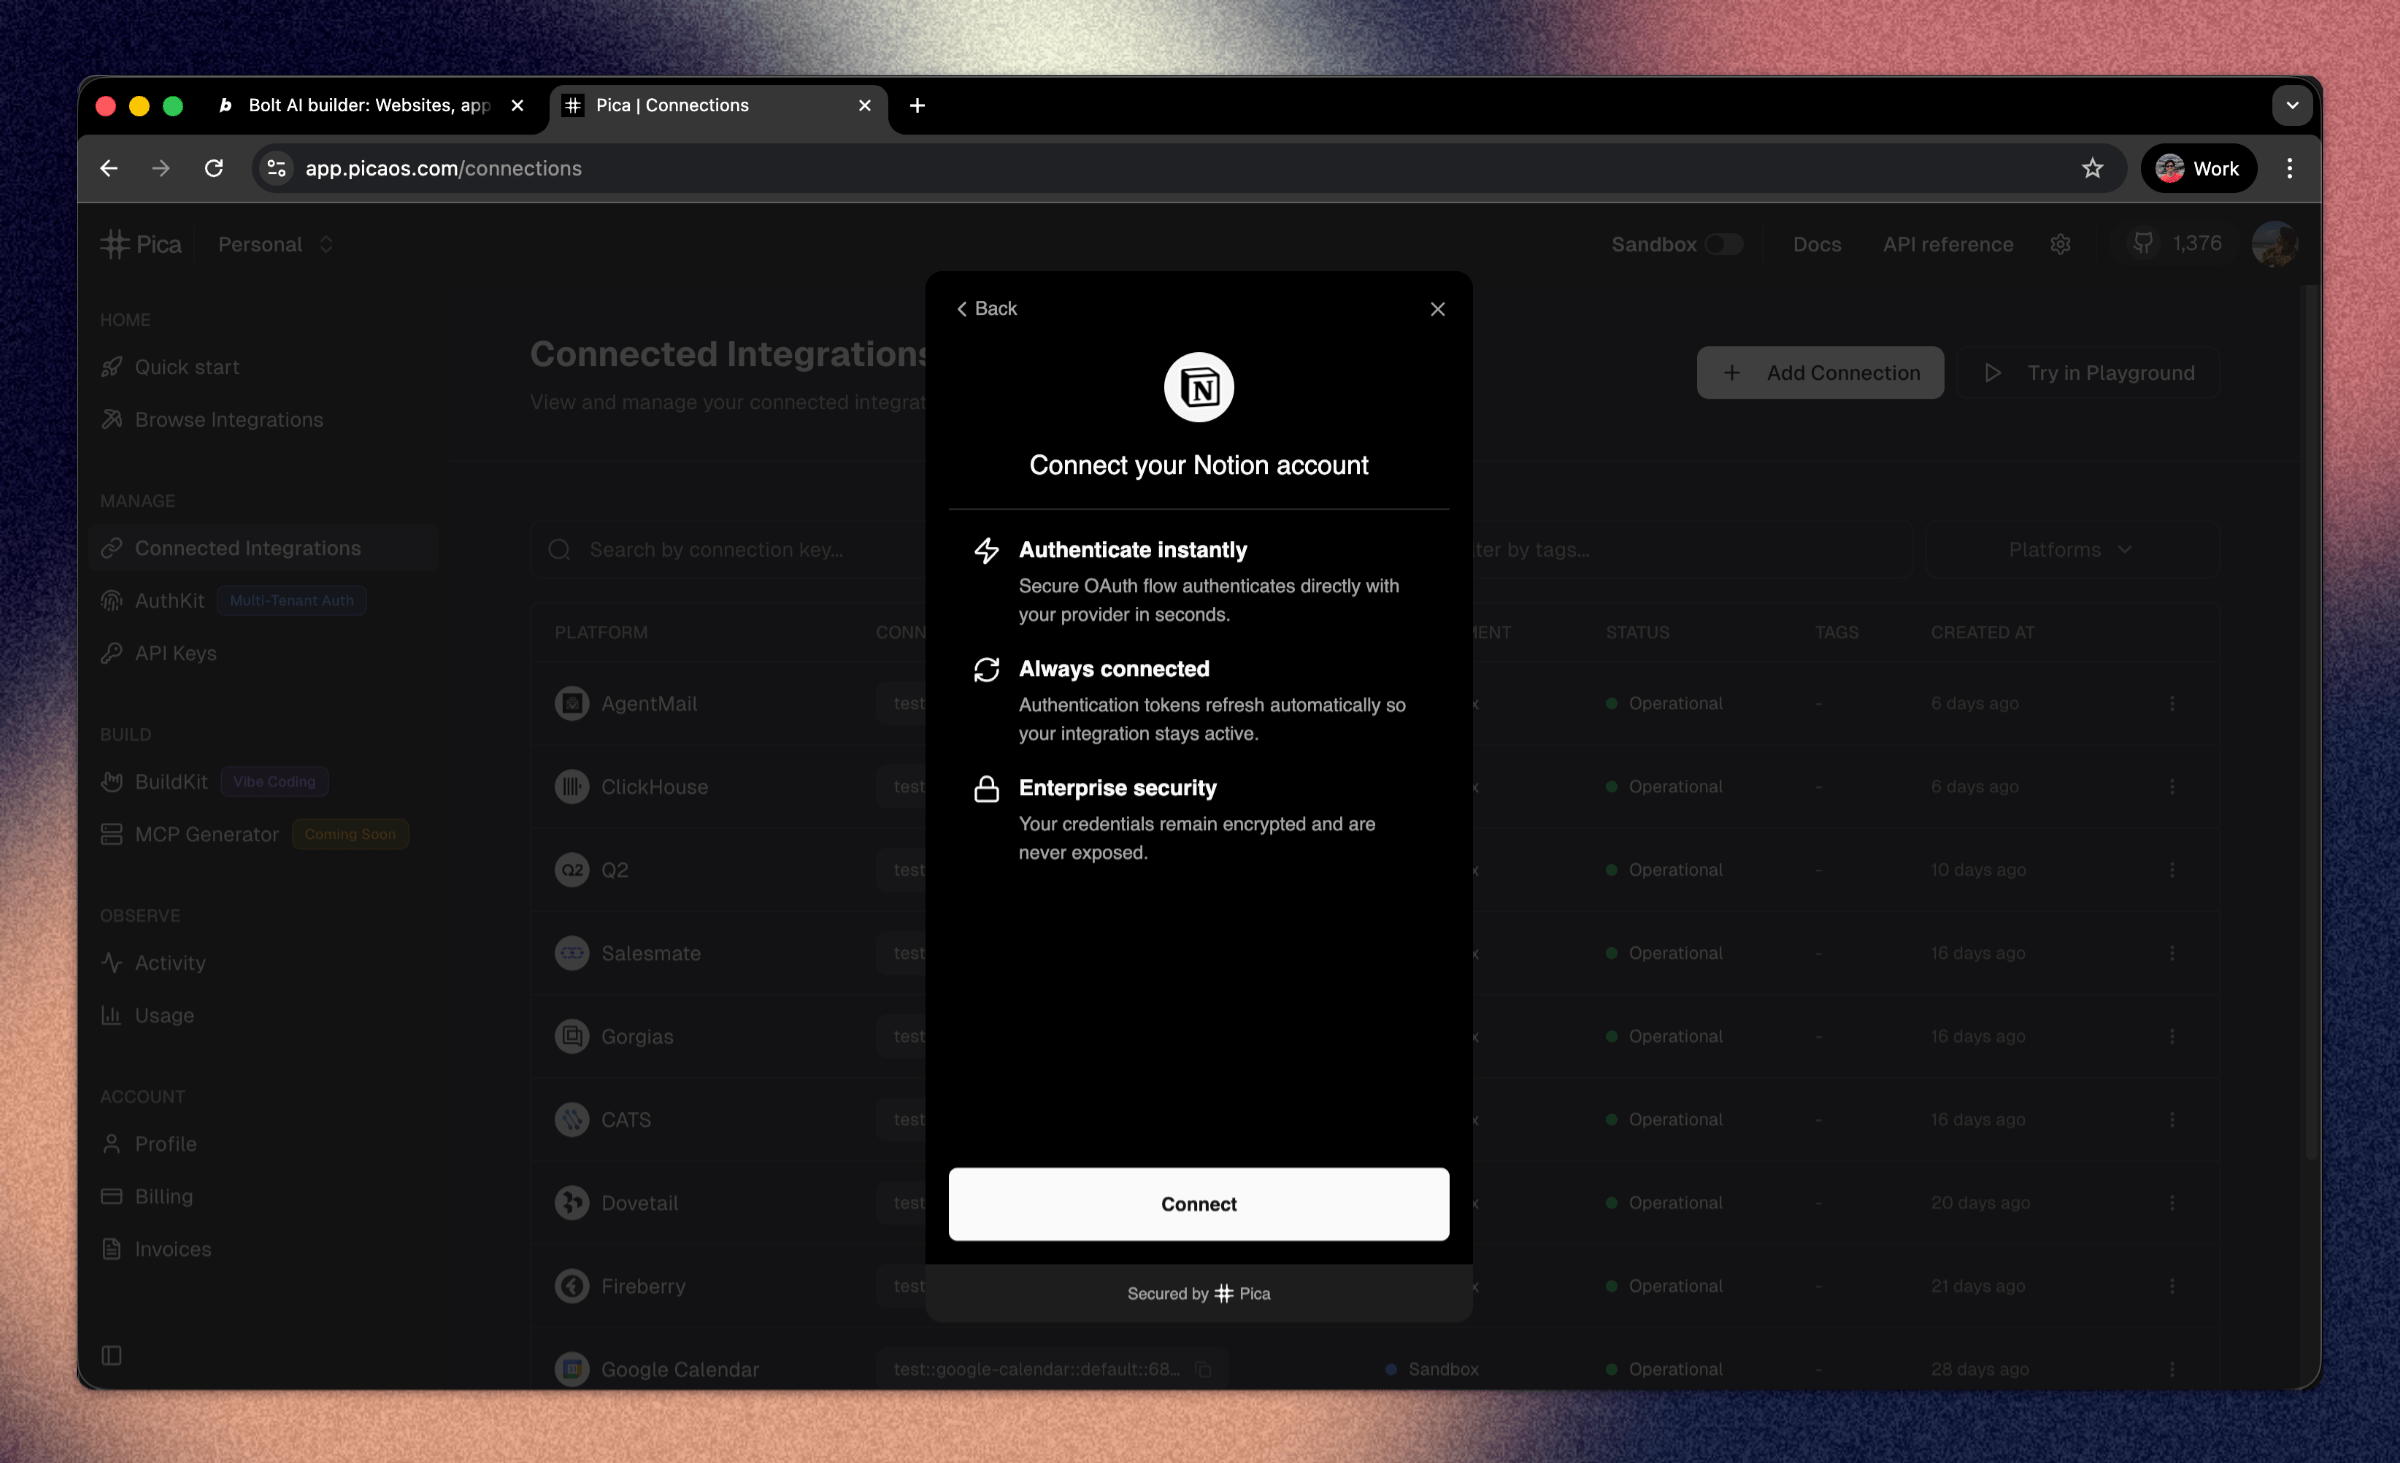
How to Connect Notion:
- Go to the Pica dashboard at: app.picaos.com/connections
- Click on
+ Add Connection - Select
Notionfrom the list of integrations - Authenticate with your Notion account
- Grant access to your database when prompted
- Save your connection key - you'll need this later!
Step 4: Copy Your Notion Database ID
To add entries to your Notion database, you'll need to get the database ID.
How to Find Your Database ID:
- Open your Notion database page
- Copy the page URL from your browser
- The URL will look like this:
https://www.notion.so/your-workspace/2b8d524b542c8097b454f66f14d8d630?v=... - The database ID is the 32-character string before the
?v=parameter- Example:
2b8d524b542c8097b454f66f14d8d630
- Example:
Keep this ID handy - you'll need it in the next step!
Step 5: Generate Your Code with BuildKit
Now we'll use Pica BuildKit to generate the perfect prompt for adding entries to your Notion database.
Using BuildKit:
- Go to the BuildKit page at: app.picaos.com/buildkit
- Type: "Retrieve the notion database [YOUR_NOTION_DATABASE_ID] and the data source id. Then I want to add pages into that datasource."
- BuildKit will generate an optimized prompt for you
Or copy the prompt here:
Important: Replace YOUR_NOTION_DATABASE_ID in the prompt with your actual database ID from Step 4.
What BuildKit Does:
BuildKit automatically generates a prompt that includes:
- ✅ Proper API authentication setup
- ✅ Database retrieval to get the data source ID
- ✅ Page creation with custom properties
- ✅ Error handling best practices
- ✅ Environment variable configuration
- ✅ Integration with your Pica Notion connection
🚀 Next step: Copy the prompt above and paste it into Bolt.new to create your backend logic!
Step 6: Add Your Secrets to Bolt
Once Bolt generates your application, you'll need to add your API keys as environment variables.
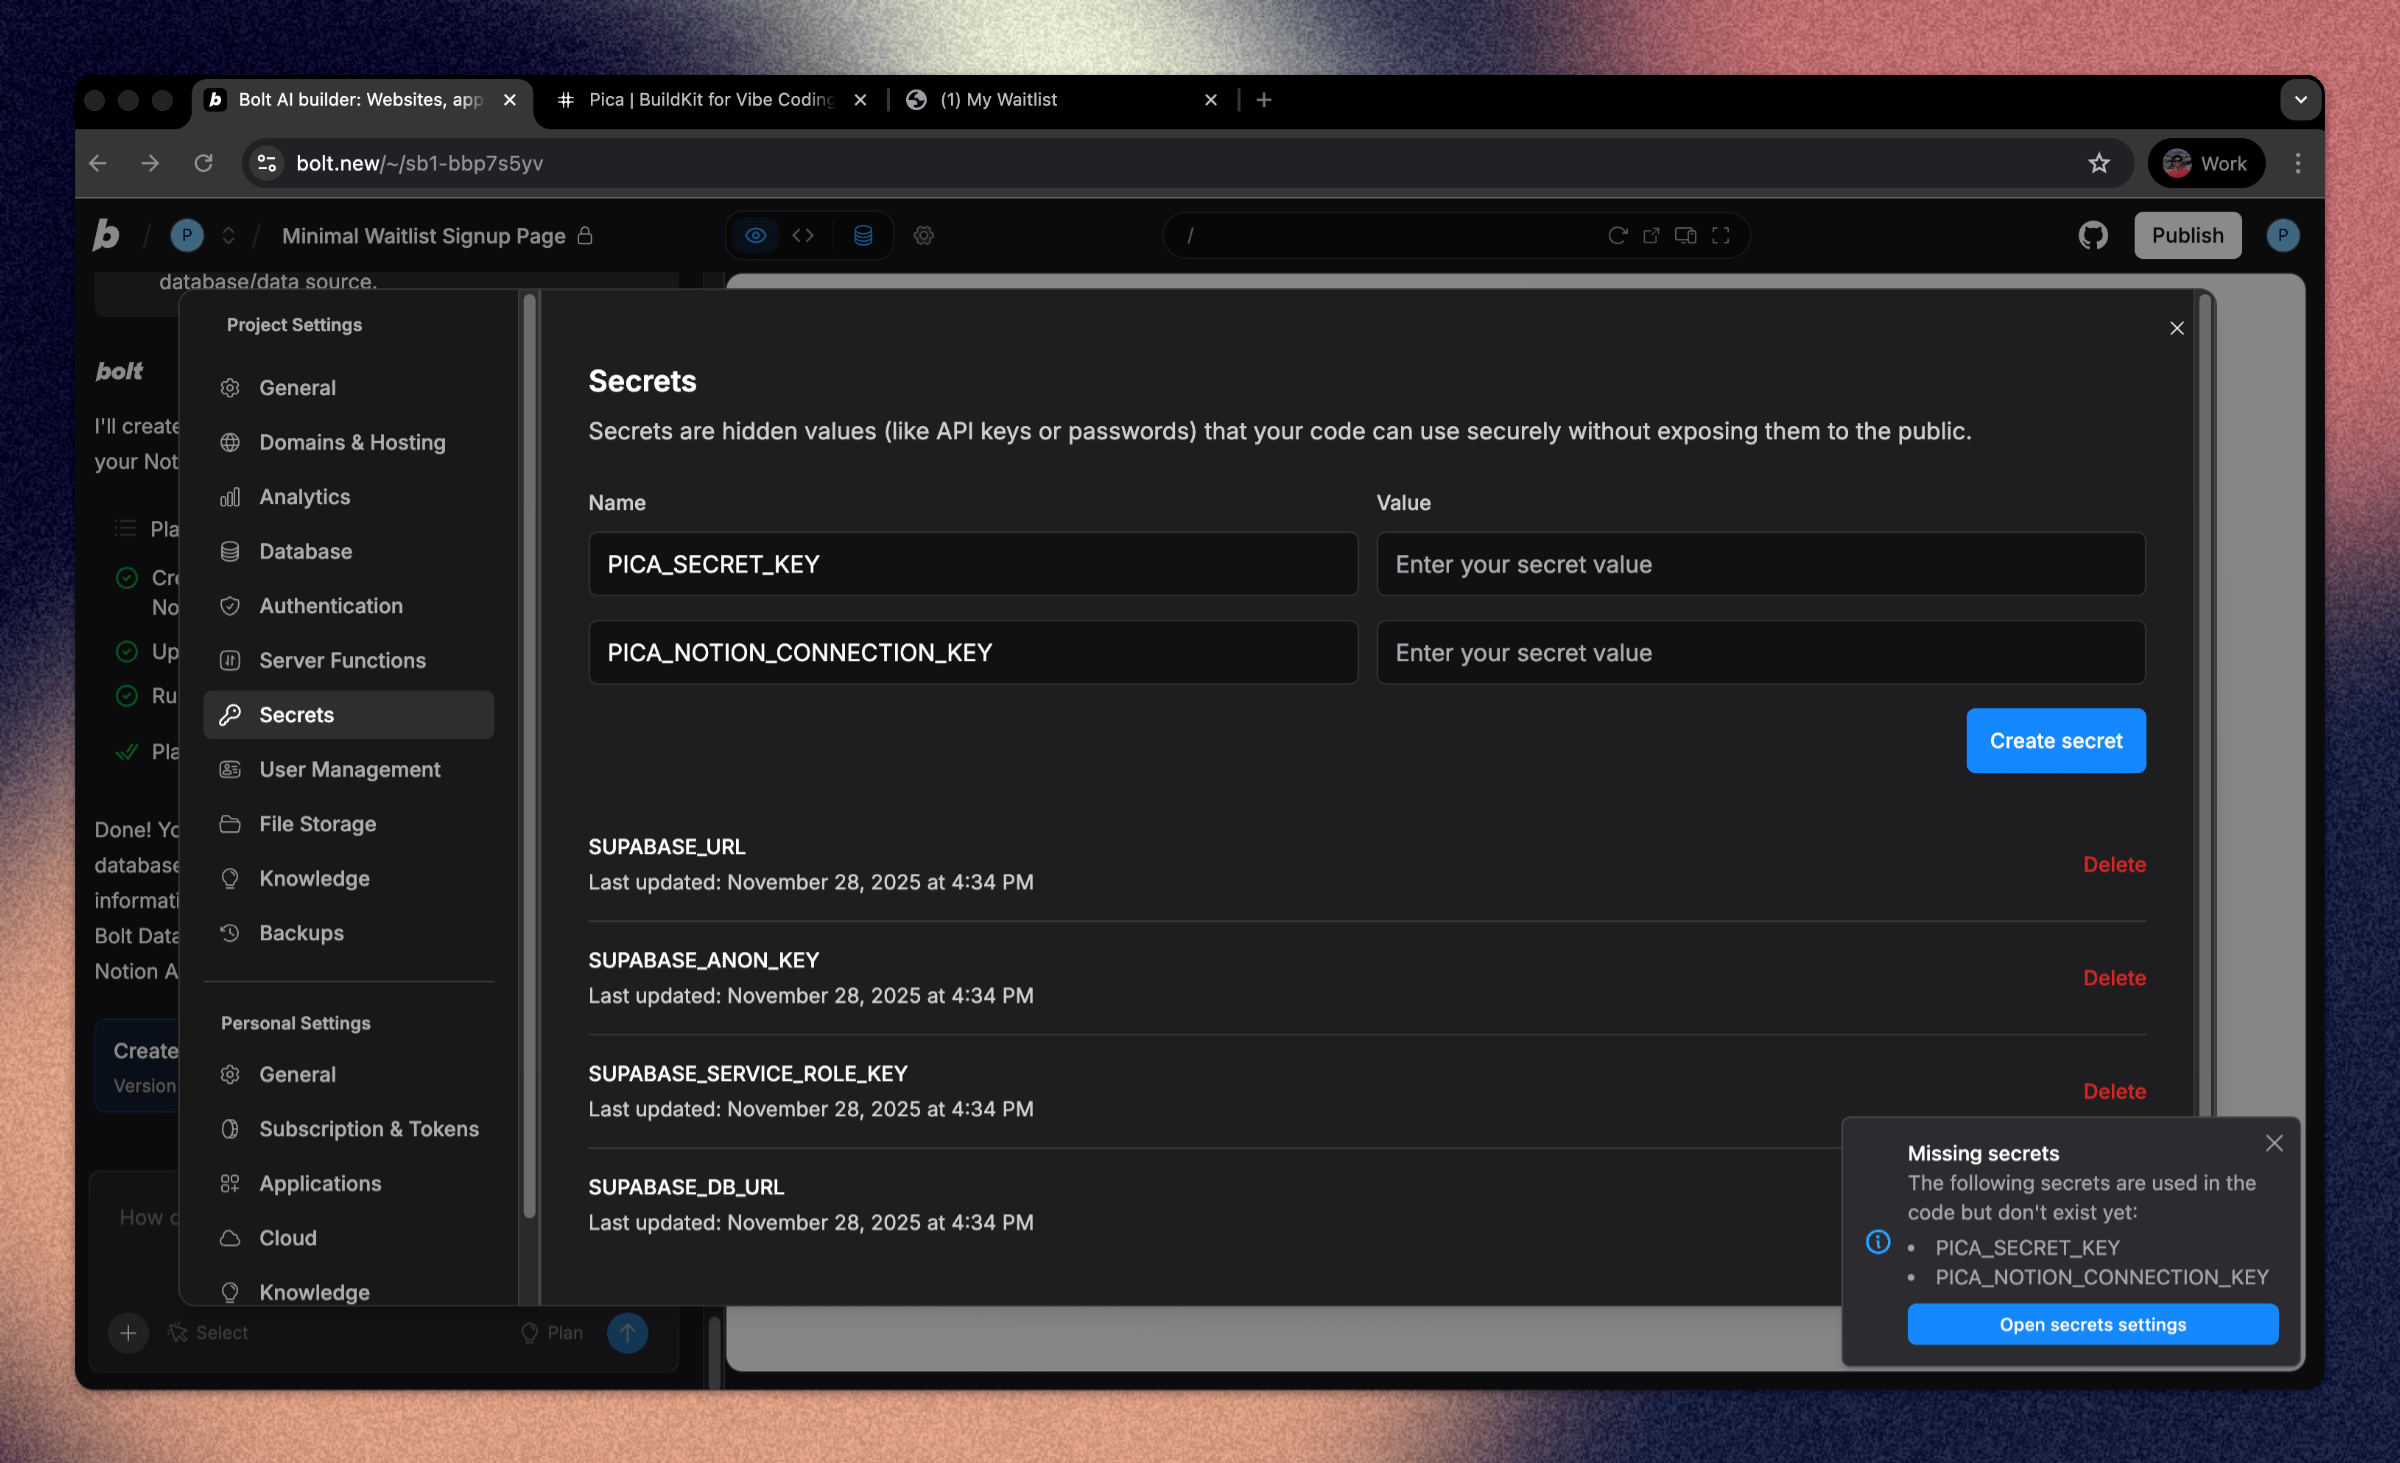
Required Environment Variables:
1. PICA_SECRET_KEY
- Get it from: app.picaos.com/settings/api-keys
- This authenticates your application with Pica
2. PICA_NOTION_CONNECTION_KEY
- Get it from: app.picaos.com/connections
- This is the connection key you saved in Step 3
How to Add Secrets in Bolt:
- Click on the Settings icon in Bolt
- Navigate to Secrets
- Add both keys with their respective values
- Save and restart your application
Now your waitlist form is connected to Notion and will save entries directly to your database! 🎉
Step 7: Try It in Action
Test your waitlist by submitting a few entries. You should see them appear in your Notion database immediately!
Troubleshooting
Form submissions not saving?
- Check your environment variables - Make sure both keys are set correctly in your Bolt secret settings
- Verify your Notion connection - Go to app.picaos.com/connections and ensure it's active
- Check database permissions - Make sure you granted Pica access to your specific database
- Verify the database ID - Ensure you're using the correct 32-character ID
- Check property names - Property names are case-sensitive (e.g., "Name", "Email")
- Check property types - Make sure "Email" is set as an Email type column in Notion
- Check Pica logs - View execution logs in your Pica dashboard
Conclusion
Congratulations! 🎉 You've just built a production-ready waitlist signup page powered by Notion in minutes. No complex database setup, no separate backend to manage—just clean, working code with data you can view and manage from Notion.
You can now track your waitlist signups directly in Notion, sort and filter entries, and even add additional automation with Notion's built-in features!
Ready to add more integrations? Explore other Bolt use cases to supercharge your application with Pica.
Get Help
Questions or need support?
- 📅 Schedule a call with our team
- 📚 Check out the Pica documentation
- 🎥 Watch our video tutorials
Happy building! 🚀