

In this guide, we'll build an Intercom-style floating widget that acts as a lead magnet on your landing page. When visitors fill out the form, a new contact is automatically created in your HubSpot CRM with the status set to UNQUALIFIED. With Bolt and Pica, you can create this production-ready lead capture system in minutes.
What You'll Build
By the end of this tutorial, you'll have:
- A beautiful landing page for your company
- A floating Intercom-style button in the bottom right corner
- A lead capture form with First Name, Last Name, Email, and Phone Number
- Direct integration with HubSpot to create new contacts
- Automatic lead status assignment for easy follow-up
Let's get started! 🚀
Step 1: Build the Landing Page and Widget UI
First, let's create a professional landing page with the floating lead capture widget.
Prompt Bolt:
"Build me a simple landing page for my company Acme. Then create the UI for a floating intercom style button in the bottom right of the screen. When clicked, it should transform to a form that collects First Name, Last Name, Email, Phone Number. The form should not be hooked up to any database. Just build me the UI."
Bolt will generate a beautiful landing page with an animated floating button that expands into a lead capture form.

Step 2: Create a HubSpot Connection in Pica
You need to connect your HubSpot account to Pica so your lead magnet can create contacts in your CRM.
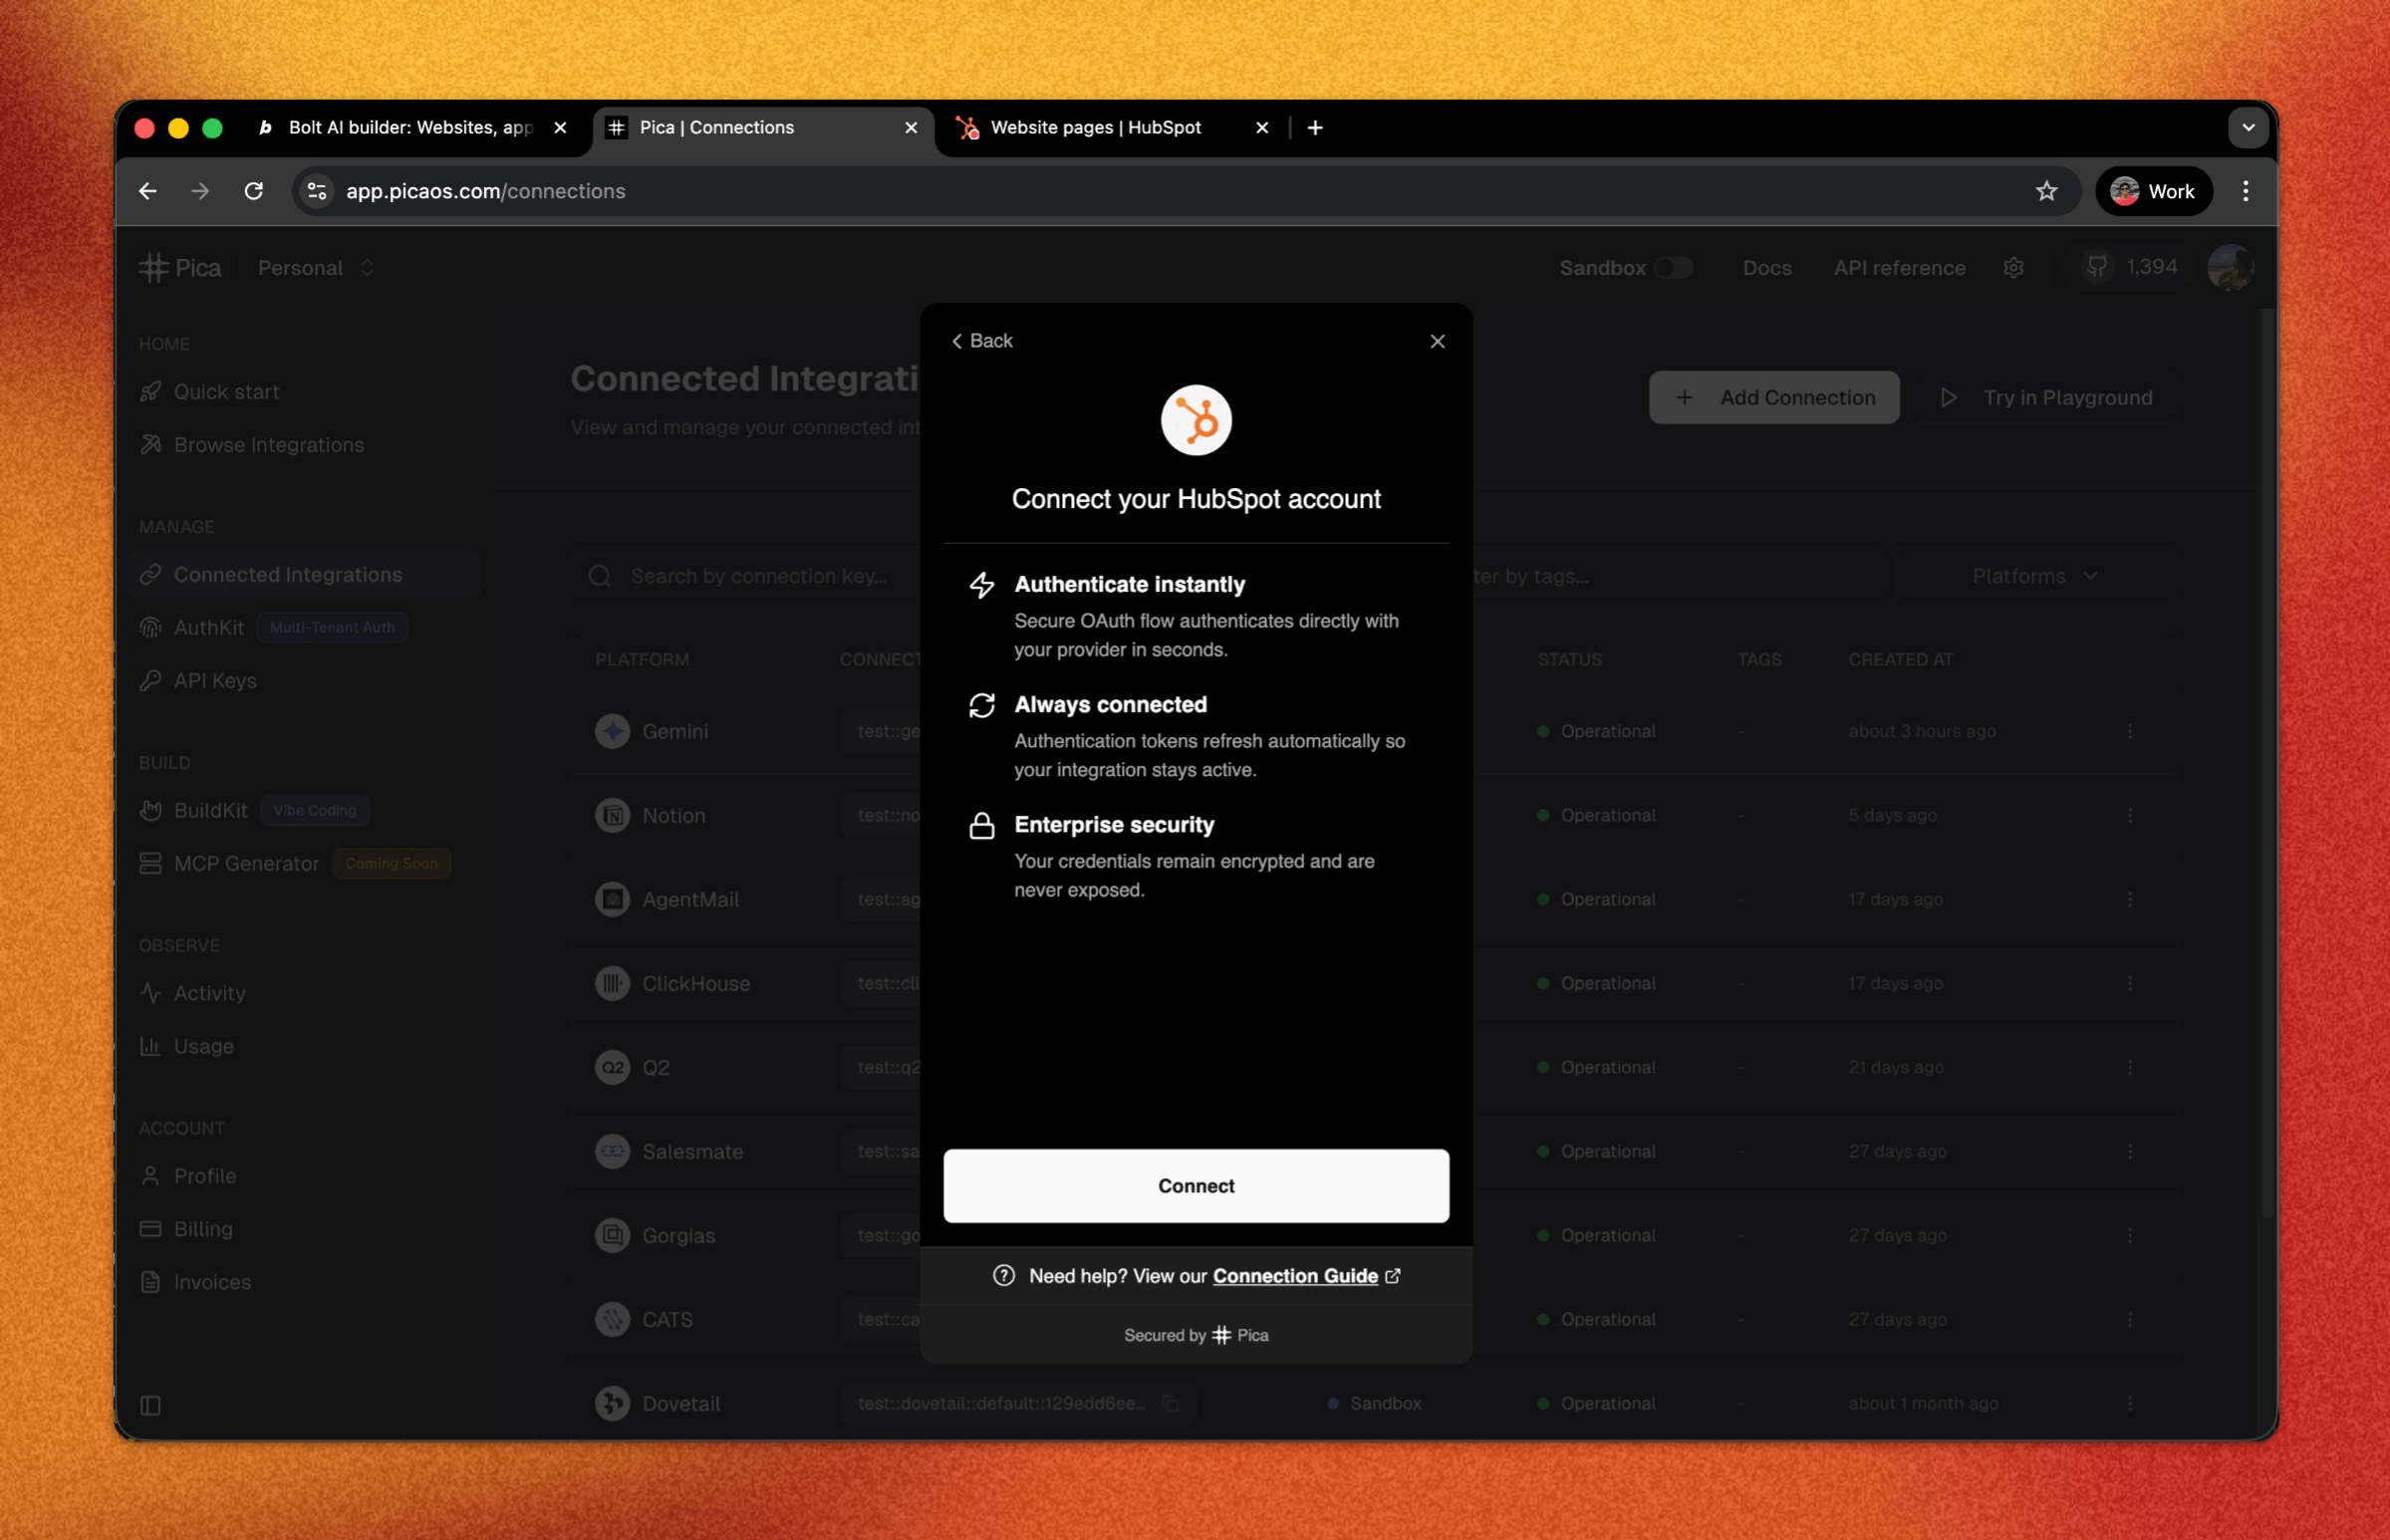
How to Connect HubSpot:
- Go to the Pica dashboard at: app.picaos.com/connections
- Click on
+ Add Connection - Select
HubSpotfrom the list of integrations - Authenticate with your HubSpot account
- Grant the necessary permissions for CRM access
- Save your connection key - you'll need this later!
Step 3: Generate Your Code with BuildKit
Now we'll use Pica BuildKit to generate the perfect prompt for creating contacts in HubSpot.
Using BuildKit:
- Go to the BuildKit page at: app.picaos.com/buildkit
- Type: "Create a new contact in my HubSpot"
- BuildKit will generate an optimized prompt for you
Or copy the prompt here:
🚀 Next step: Copy the prompt above and paste it into Bolt.new to create your backend logic!
What BuildKit Does:
BuildKit automatically generates a prompt that includes:
- ✅ Proper API authentication setup
- ✅ Contact creation with all form fields
- ✅ Lead status assignment (UNQUALIFIED)
- ✅ Error handling best practices
- ✅ Environment variable configuration
- ✅ Integration with your Pica HubSpot connection
Step 4: Add Your Secrets to Bolt
Once Bolt generates your application, you'll need to add your API keys as environment variables.
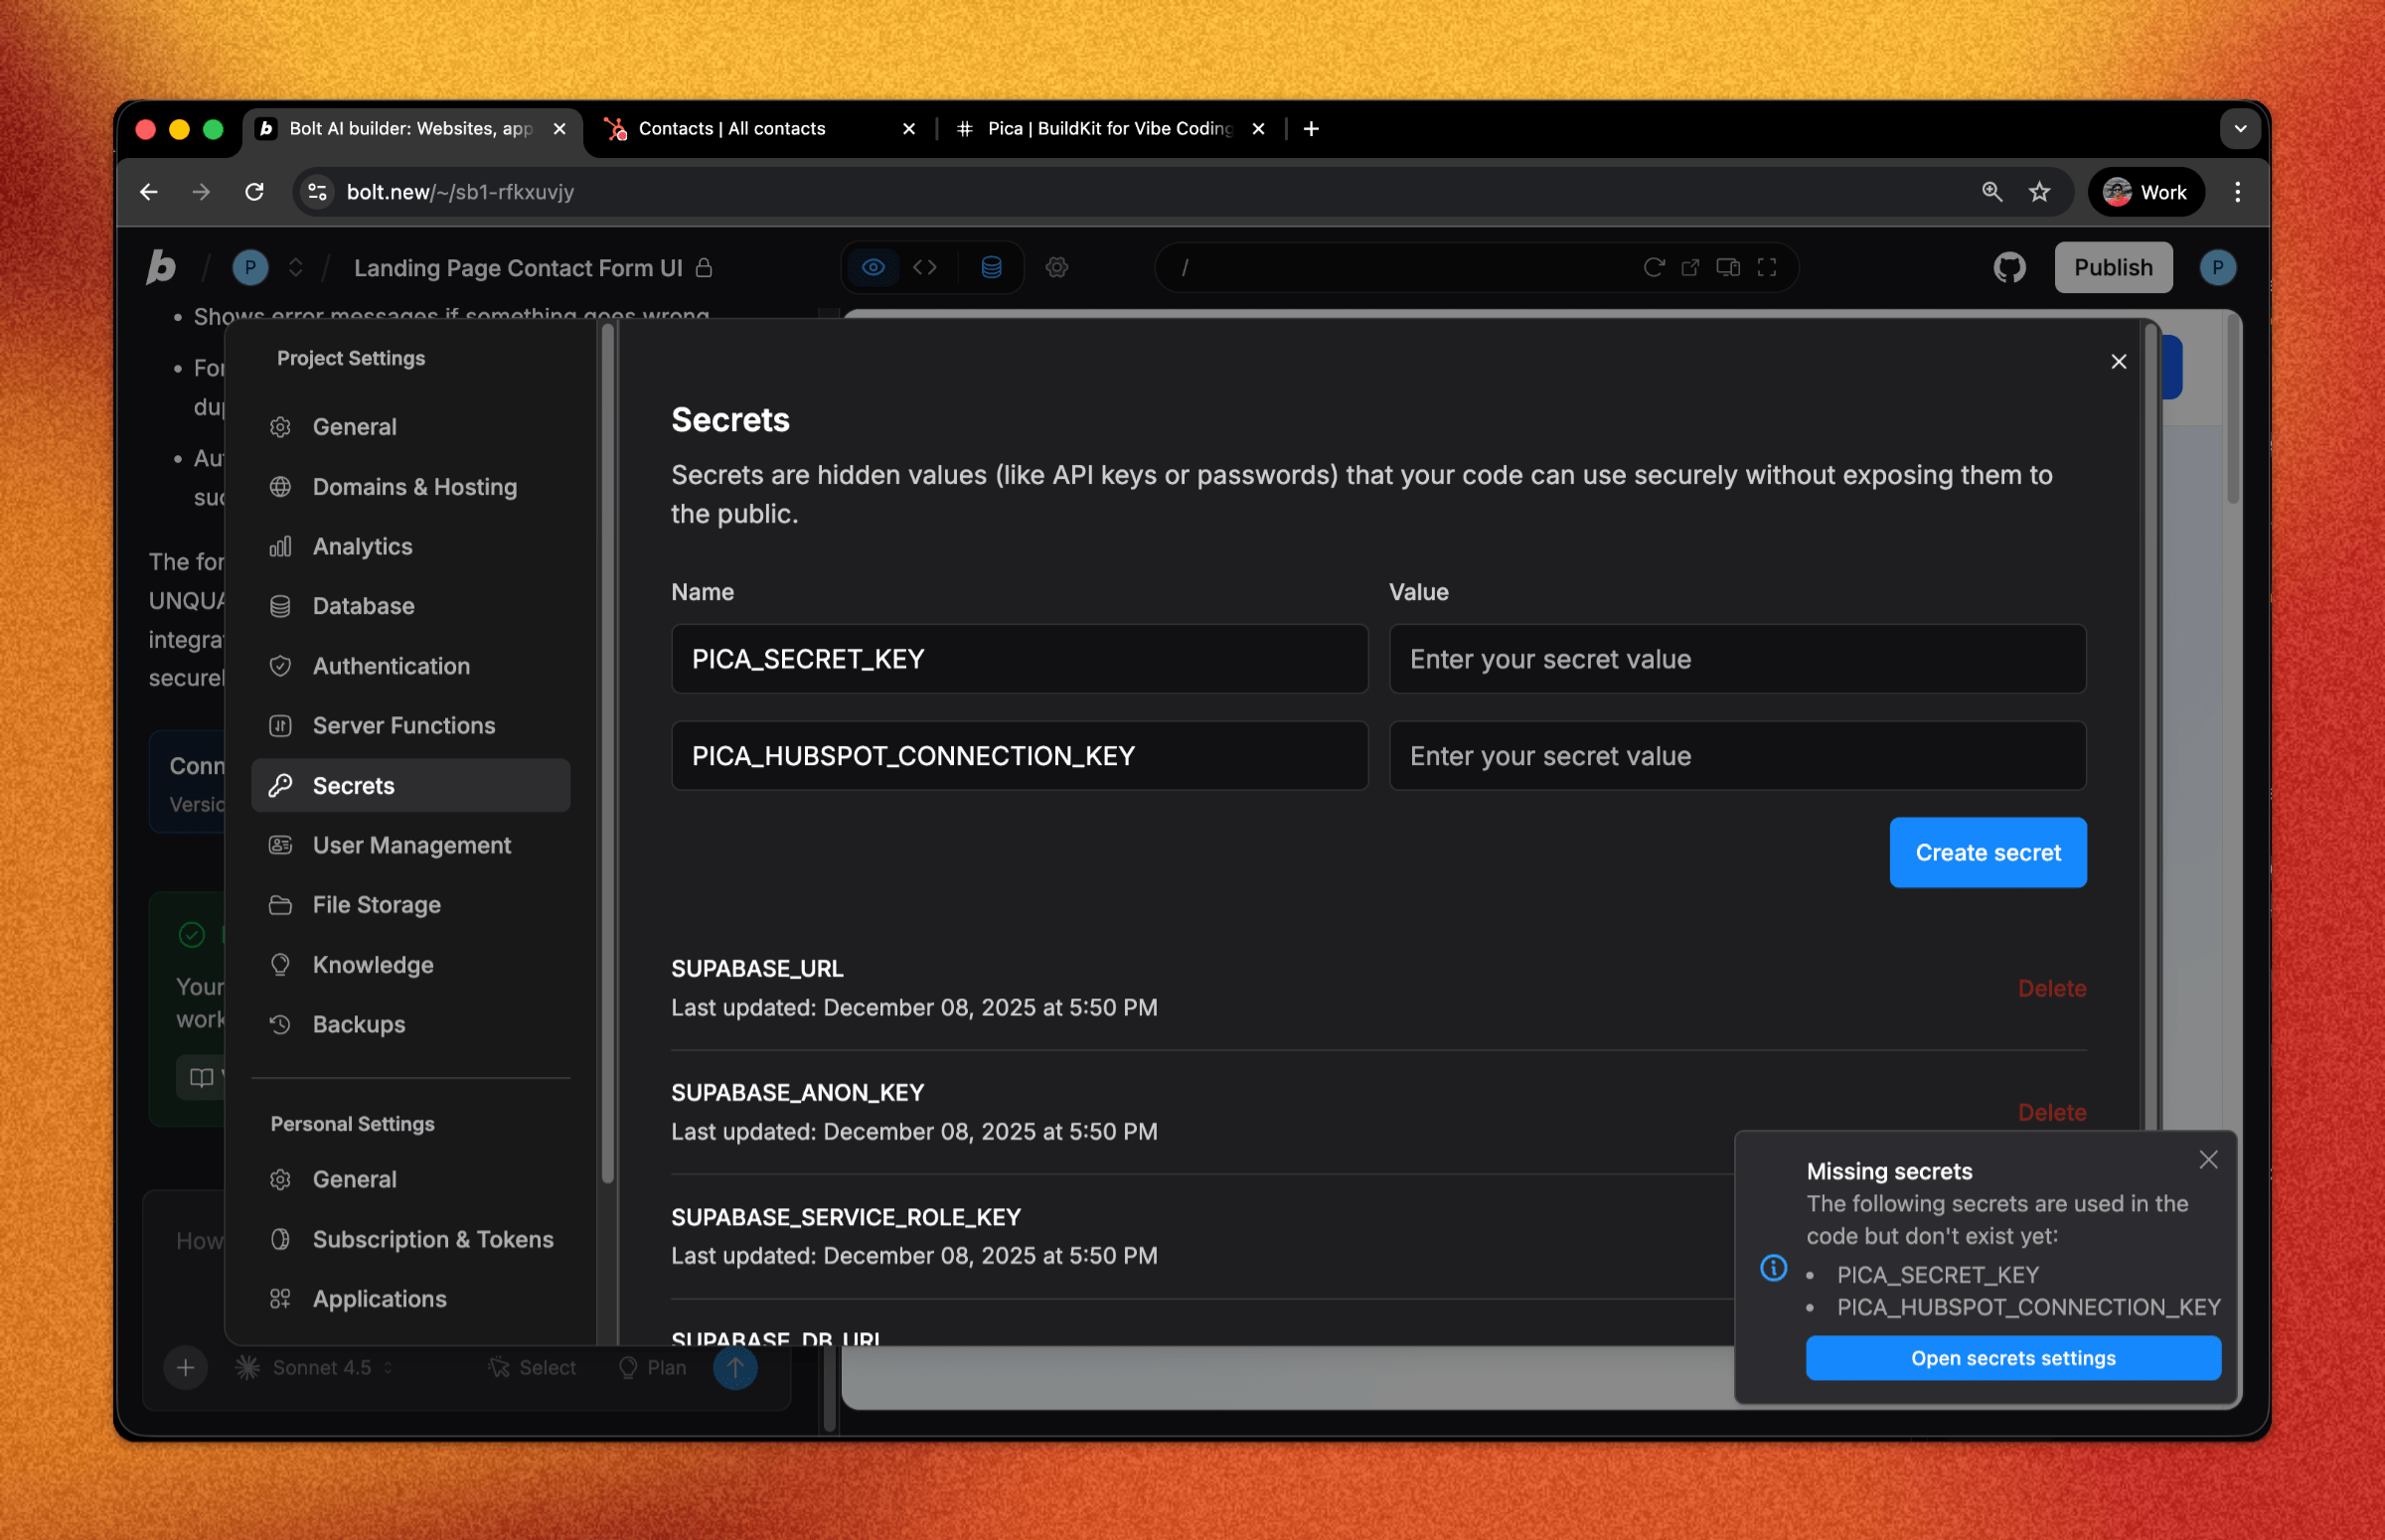
Required Environment Variables:
1. PICA_SECRET_KEY
- Get it from: app.picaos.com/settings/api-keys
- This authenticates your application with Pica
2. PICA_HUBSPOT_CONNECTION_KEY
- Get it from: app.picaos.com/connections
- This is the connection key you saved in Step 2
How to Add Secrets in Bolt:
- Click on the Settings icon in Bolt
- Navigate to Secrets
- Add both keys with their respective values
- Save and restart your application
Now your lead magnet widget is connected to HubSpot and will create new contacts automatically! 🎉
Step 5: Try It in Action
Test your lead magnet by filling out the form. You should see new contacts appear in your HubSpot CRM immediately with the status set to Unqualified 🚀
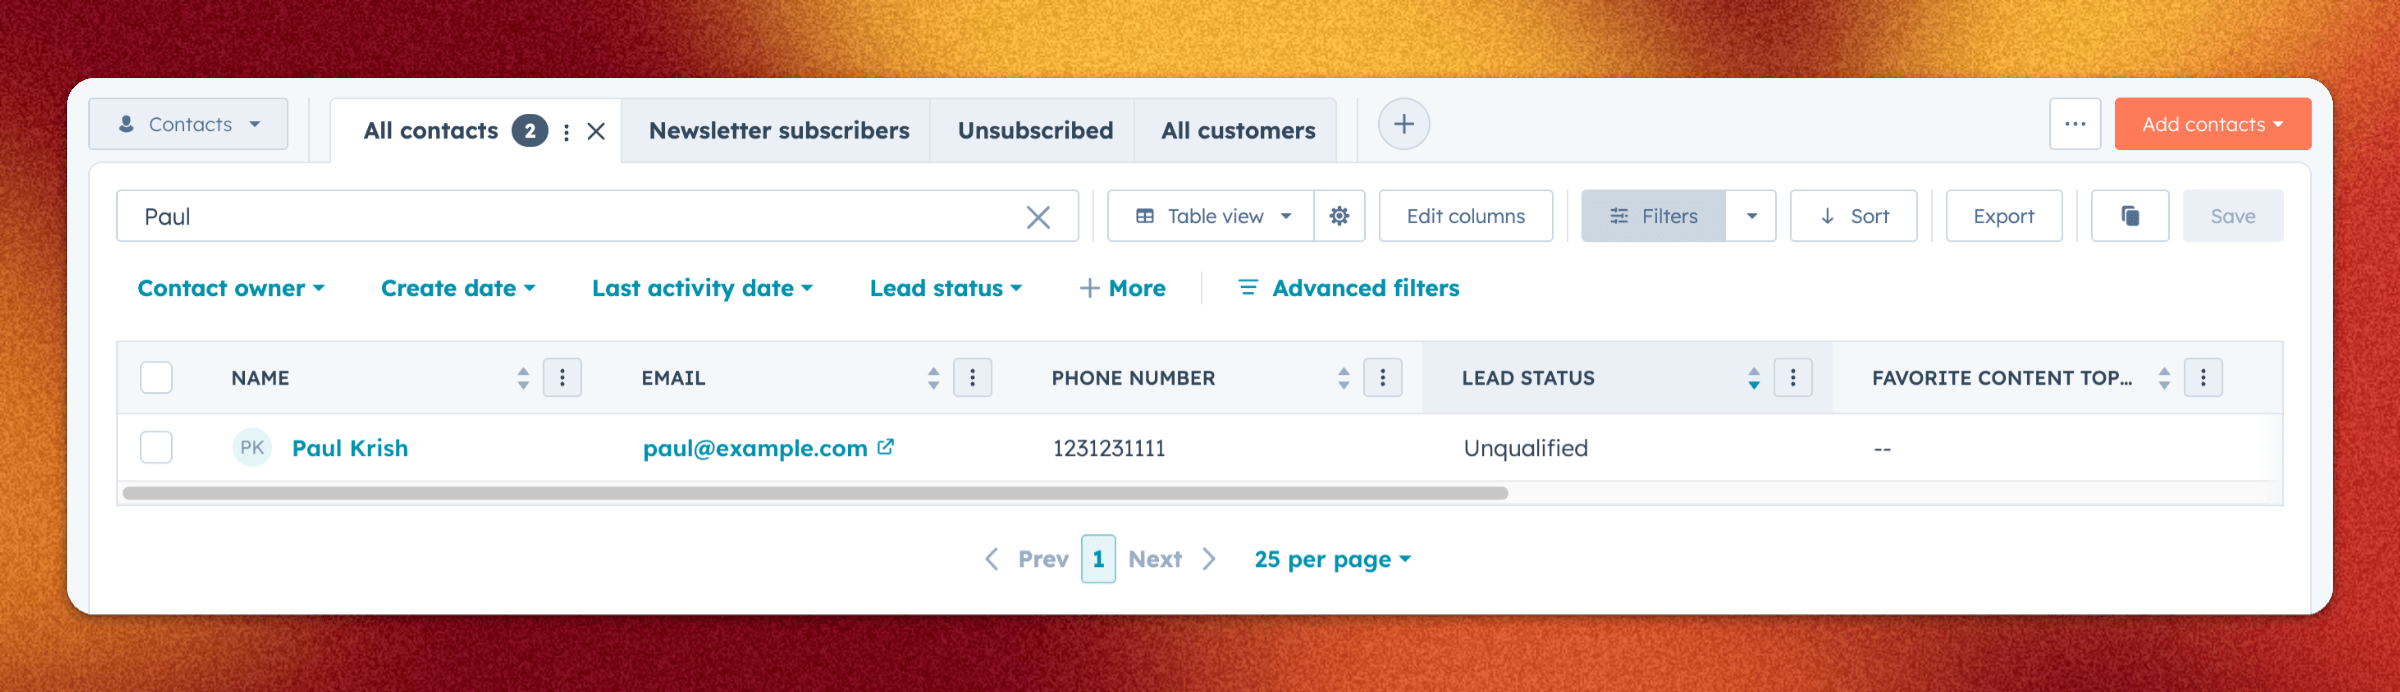
Verifying in HubSpot:
- Go to your HubSpot dashboard
- Navigate to Contacts > All Contacts
- You should see the new contact with:
- First Name and Last Name
- Email address
- Phone number
- Lead Status: UNQUALIFIED
Troubleshooting
Form submissions not creating contacts?
- Check your environment variables - Make sure both keys are set correctly in your Bolt secret settings
- Verify your HubSpot connection - Go to app.picaos.com/connections and ensure it's active
- Check for duplicate emails - HubSpot doesn't allow duplicate email addresses. Try with a unique email
- Verify permissions - Make sure your HubSpot connection has CRM write access
- Check Pica logs - View execution logs in your Pica dashboard
Contact not showing the right lead status?
Make sure the hs_lead_status property is set to UNQUALIFIED in your request body. Valid values include: UNQUALIFIED, NEW, OPEN, IN_PROGRESS, QUALIFIED.
Conclusion
Congratulations! 🎉 You've just built a production-ready Intercom-style lead magnet in minutes. Every visitor who fills out your floating form is now automatically added to your HubSpot CRM as an unqualified lead, ready for your sales team to follow up!
What you can do next:
- Customize the widget styling to match your brand
- Add additional fields like company name or message
- Set up HubSpot workflows to automatically follow up with new leads
- Create different lead statuses based on form source
Ready to add more integrations? Explore other Bolt use cases to supercharge your application with Pica.
Get Help
Questions or need support?
- 📅 Schedule a call with our team
- 📚 Check out the Pica documentation
- 🎥 Watch our video tutorials
Happy building! 🚀