

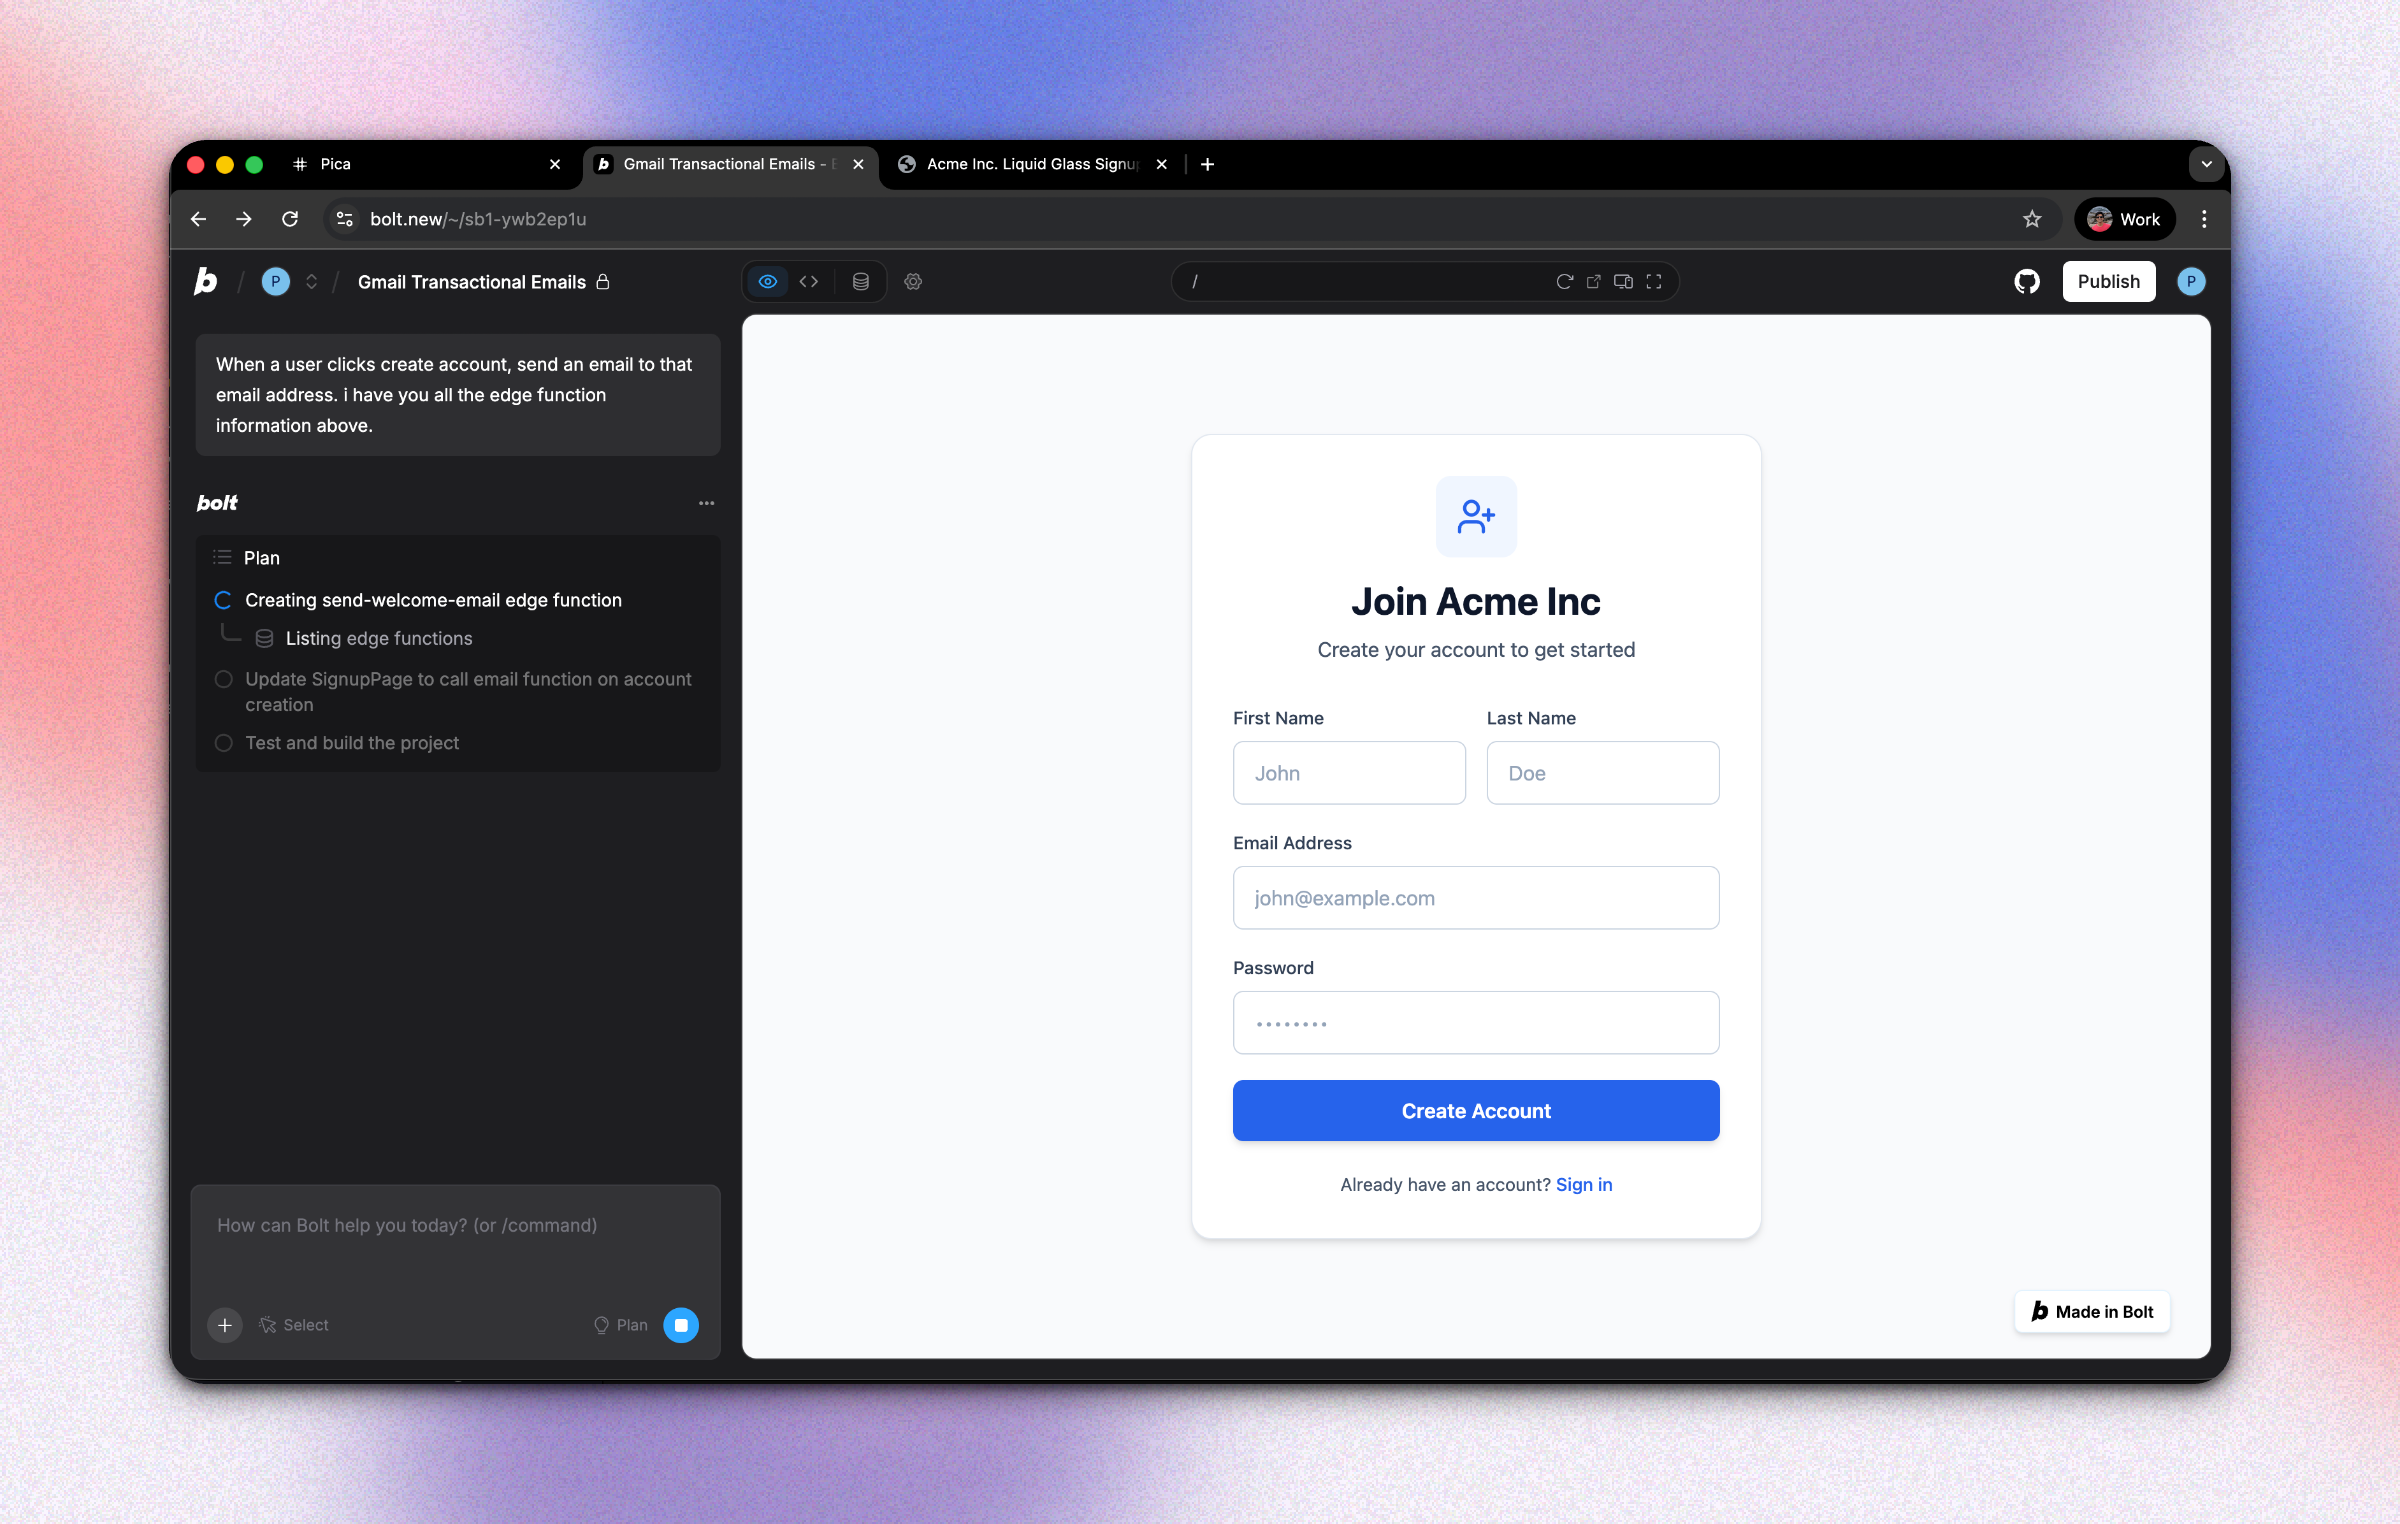
In this guide, we'll build a transactional email system that sends a welcome email when new users sign up to your Bolt application. With Bolt and Pica, you can create a production-ready email service in minutes—no complex SMTP configuration required. We've already created a sample signup form but if you don't have one, you can create one first.
What You'll Build
By the end of this tutorial, you'll have:
- A Gmail connection configured in Pica
- Production-ready backend logic to send emails in your Bolt application
- A way to customize your email design
Let's get started! 🚀
Step 1: Create a Gmail Connection in Pica
First, you need to connect your Gmail account to Pica. This will allow your application to send emails on your behalf.
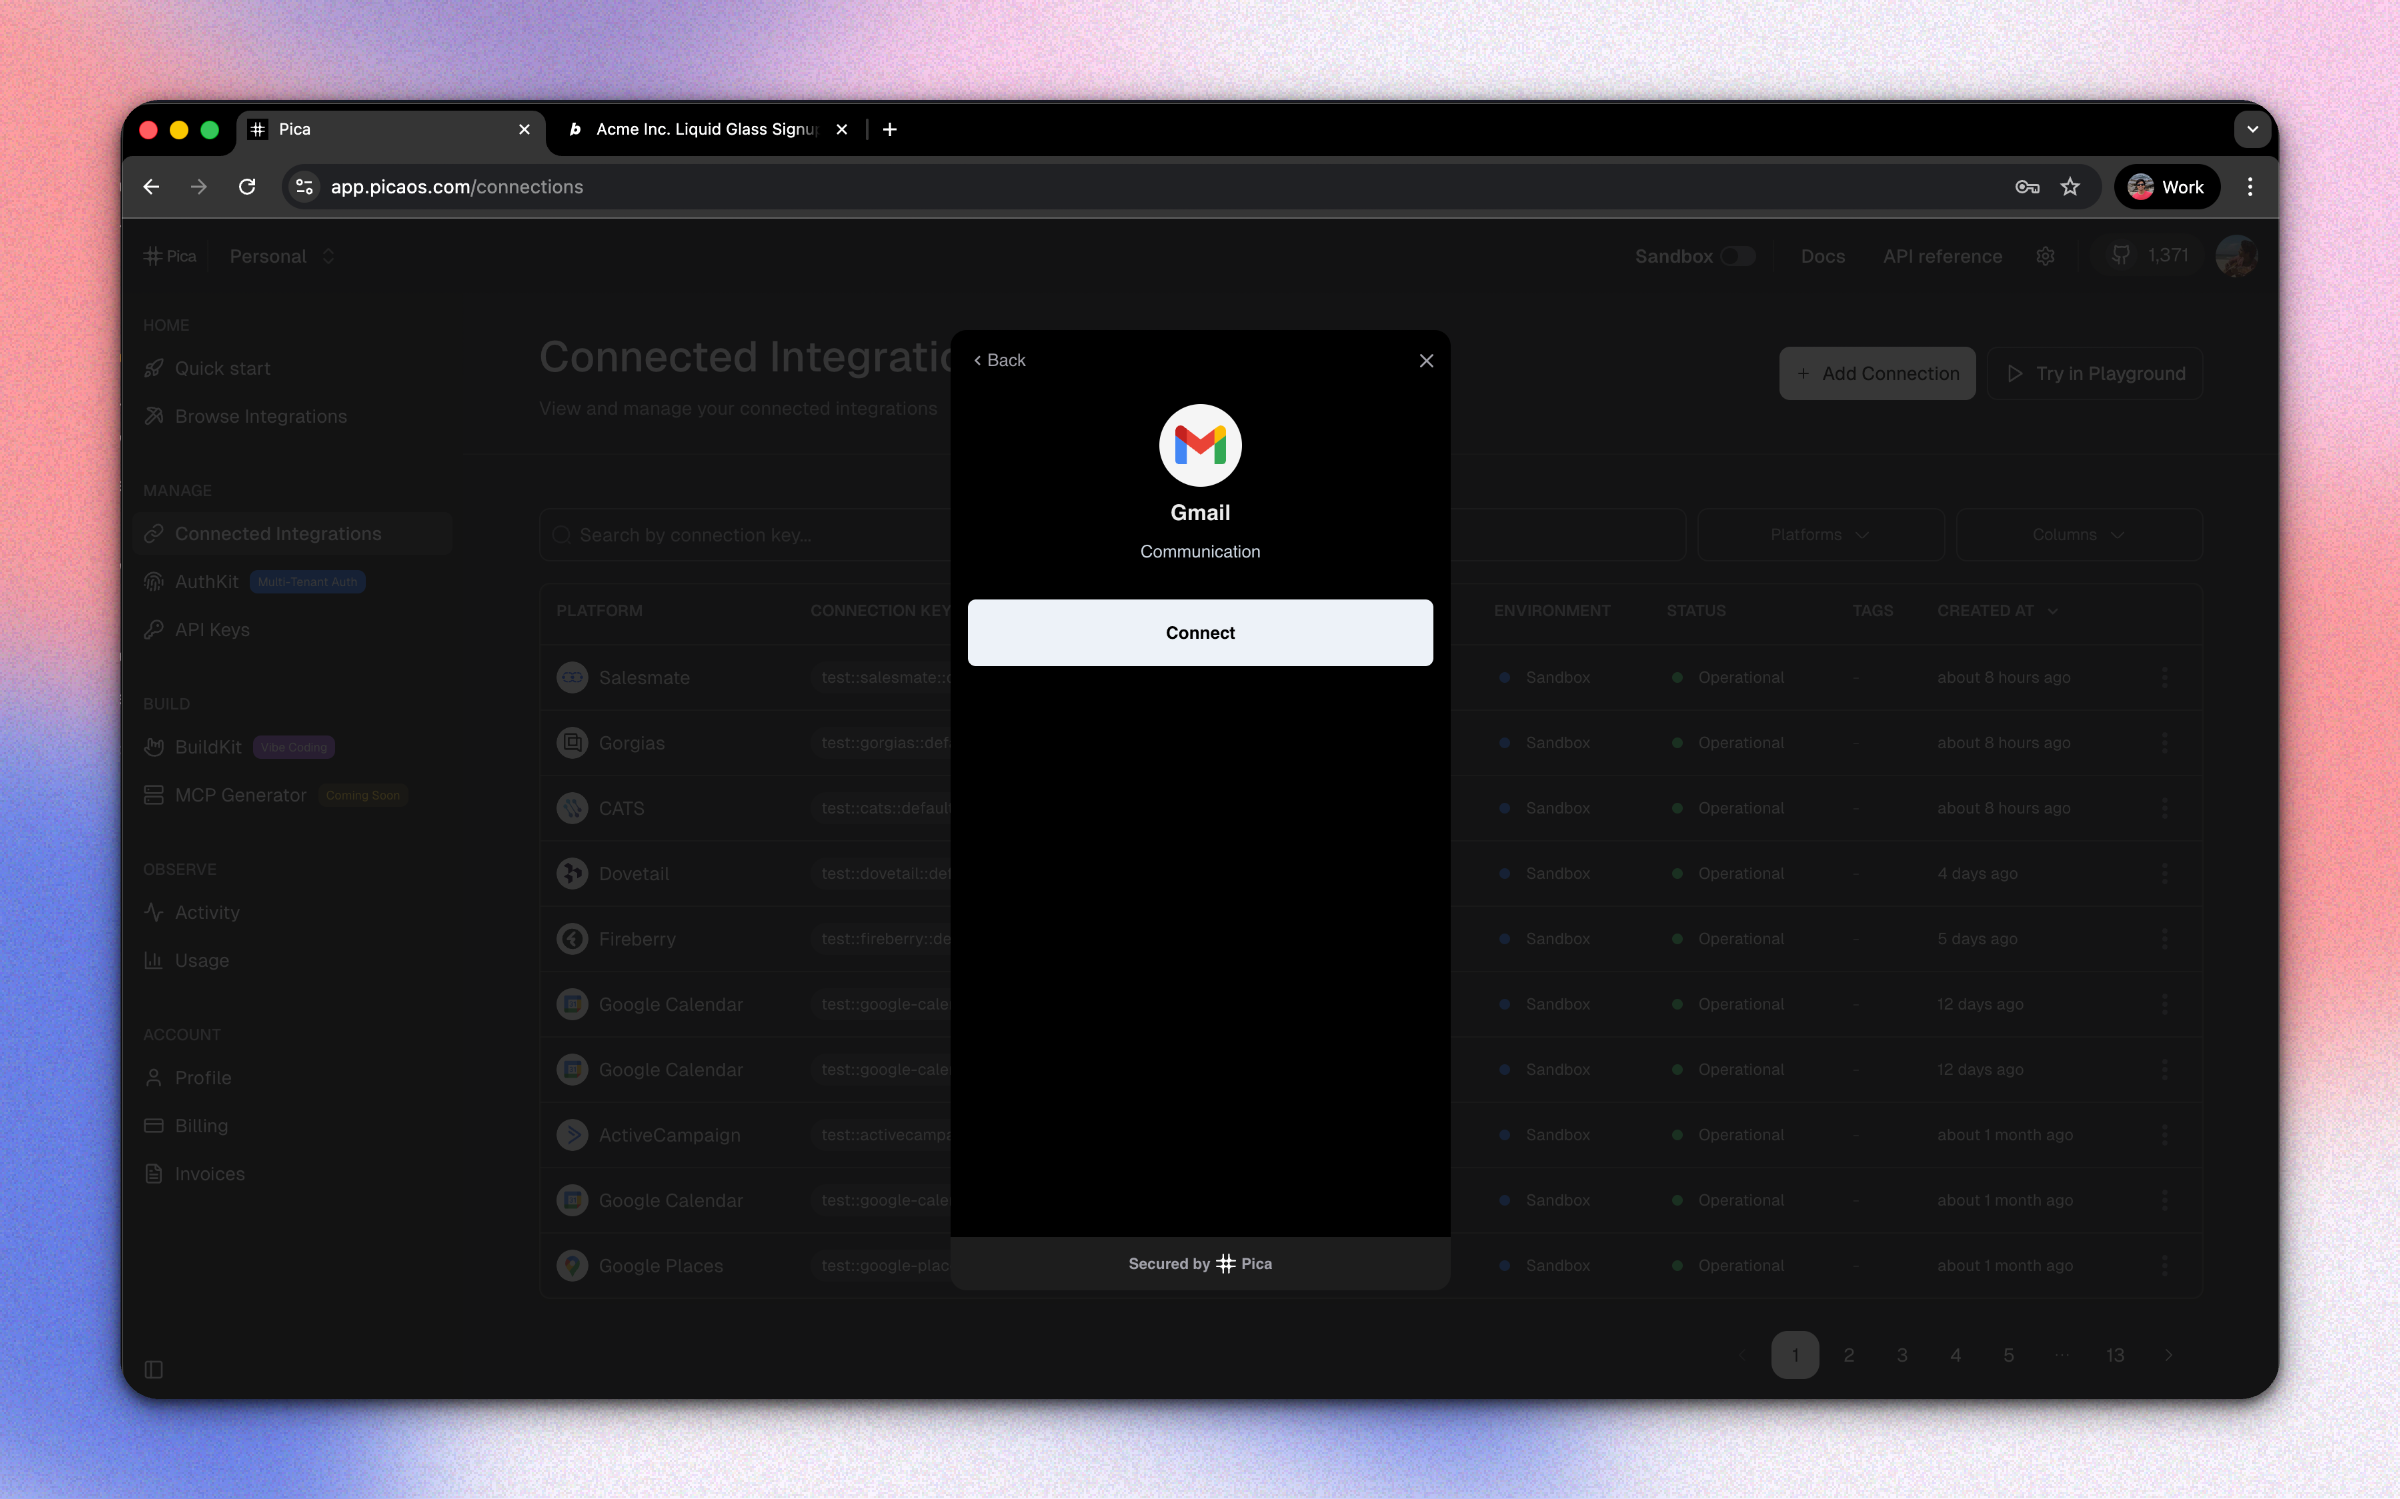
How to Connect Gmail:
- Go to the Pica dashboard at: app.picaos.com/connections
- Click on
+ Add Connection - Select
Gmailfrom the list of integrations - Authenticate with your Google account
- Save your connection key - you'll need this later!
Step 2: Generate Your Code with BuildKit
Now comes the magic! We're going to use Pica BuildKit to generate the perfect prompt for Bolt. BuildKit understands how to structure prompts for sending transactional emails.
Using BuildKit:
- Go to the BuildKit page at: app.picaos.com/buildkit
- Type: "Send a welcome email via gmail"
- BuildKit will generate an optimized prompt for you
Or copy the prompt here:
🚀 Next step: Copy the prompt above and paste it into Bolt.new to create your backend logic!
What BuildKit Does:
BuildKit automatically generates a prompt that includes:
- ✅ Proper API authentication setup
- ✅ Error handling best practices
- ✅ Environment variable configuration
- ✅ HTML email template structure
- ✅ Integration with your Pica Gmail connection
Step 3: Add Your Secrets to Bolt
Once Bolt generates your application, you'll need to add your API keys as environment variables.
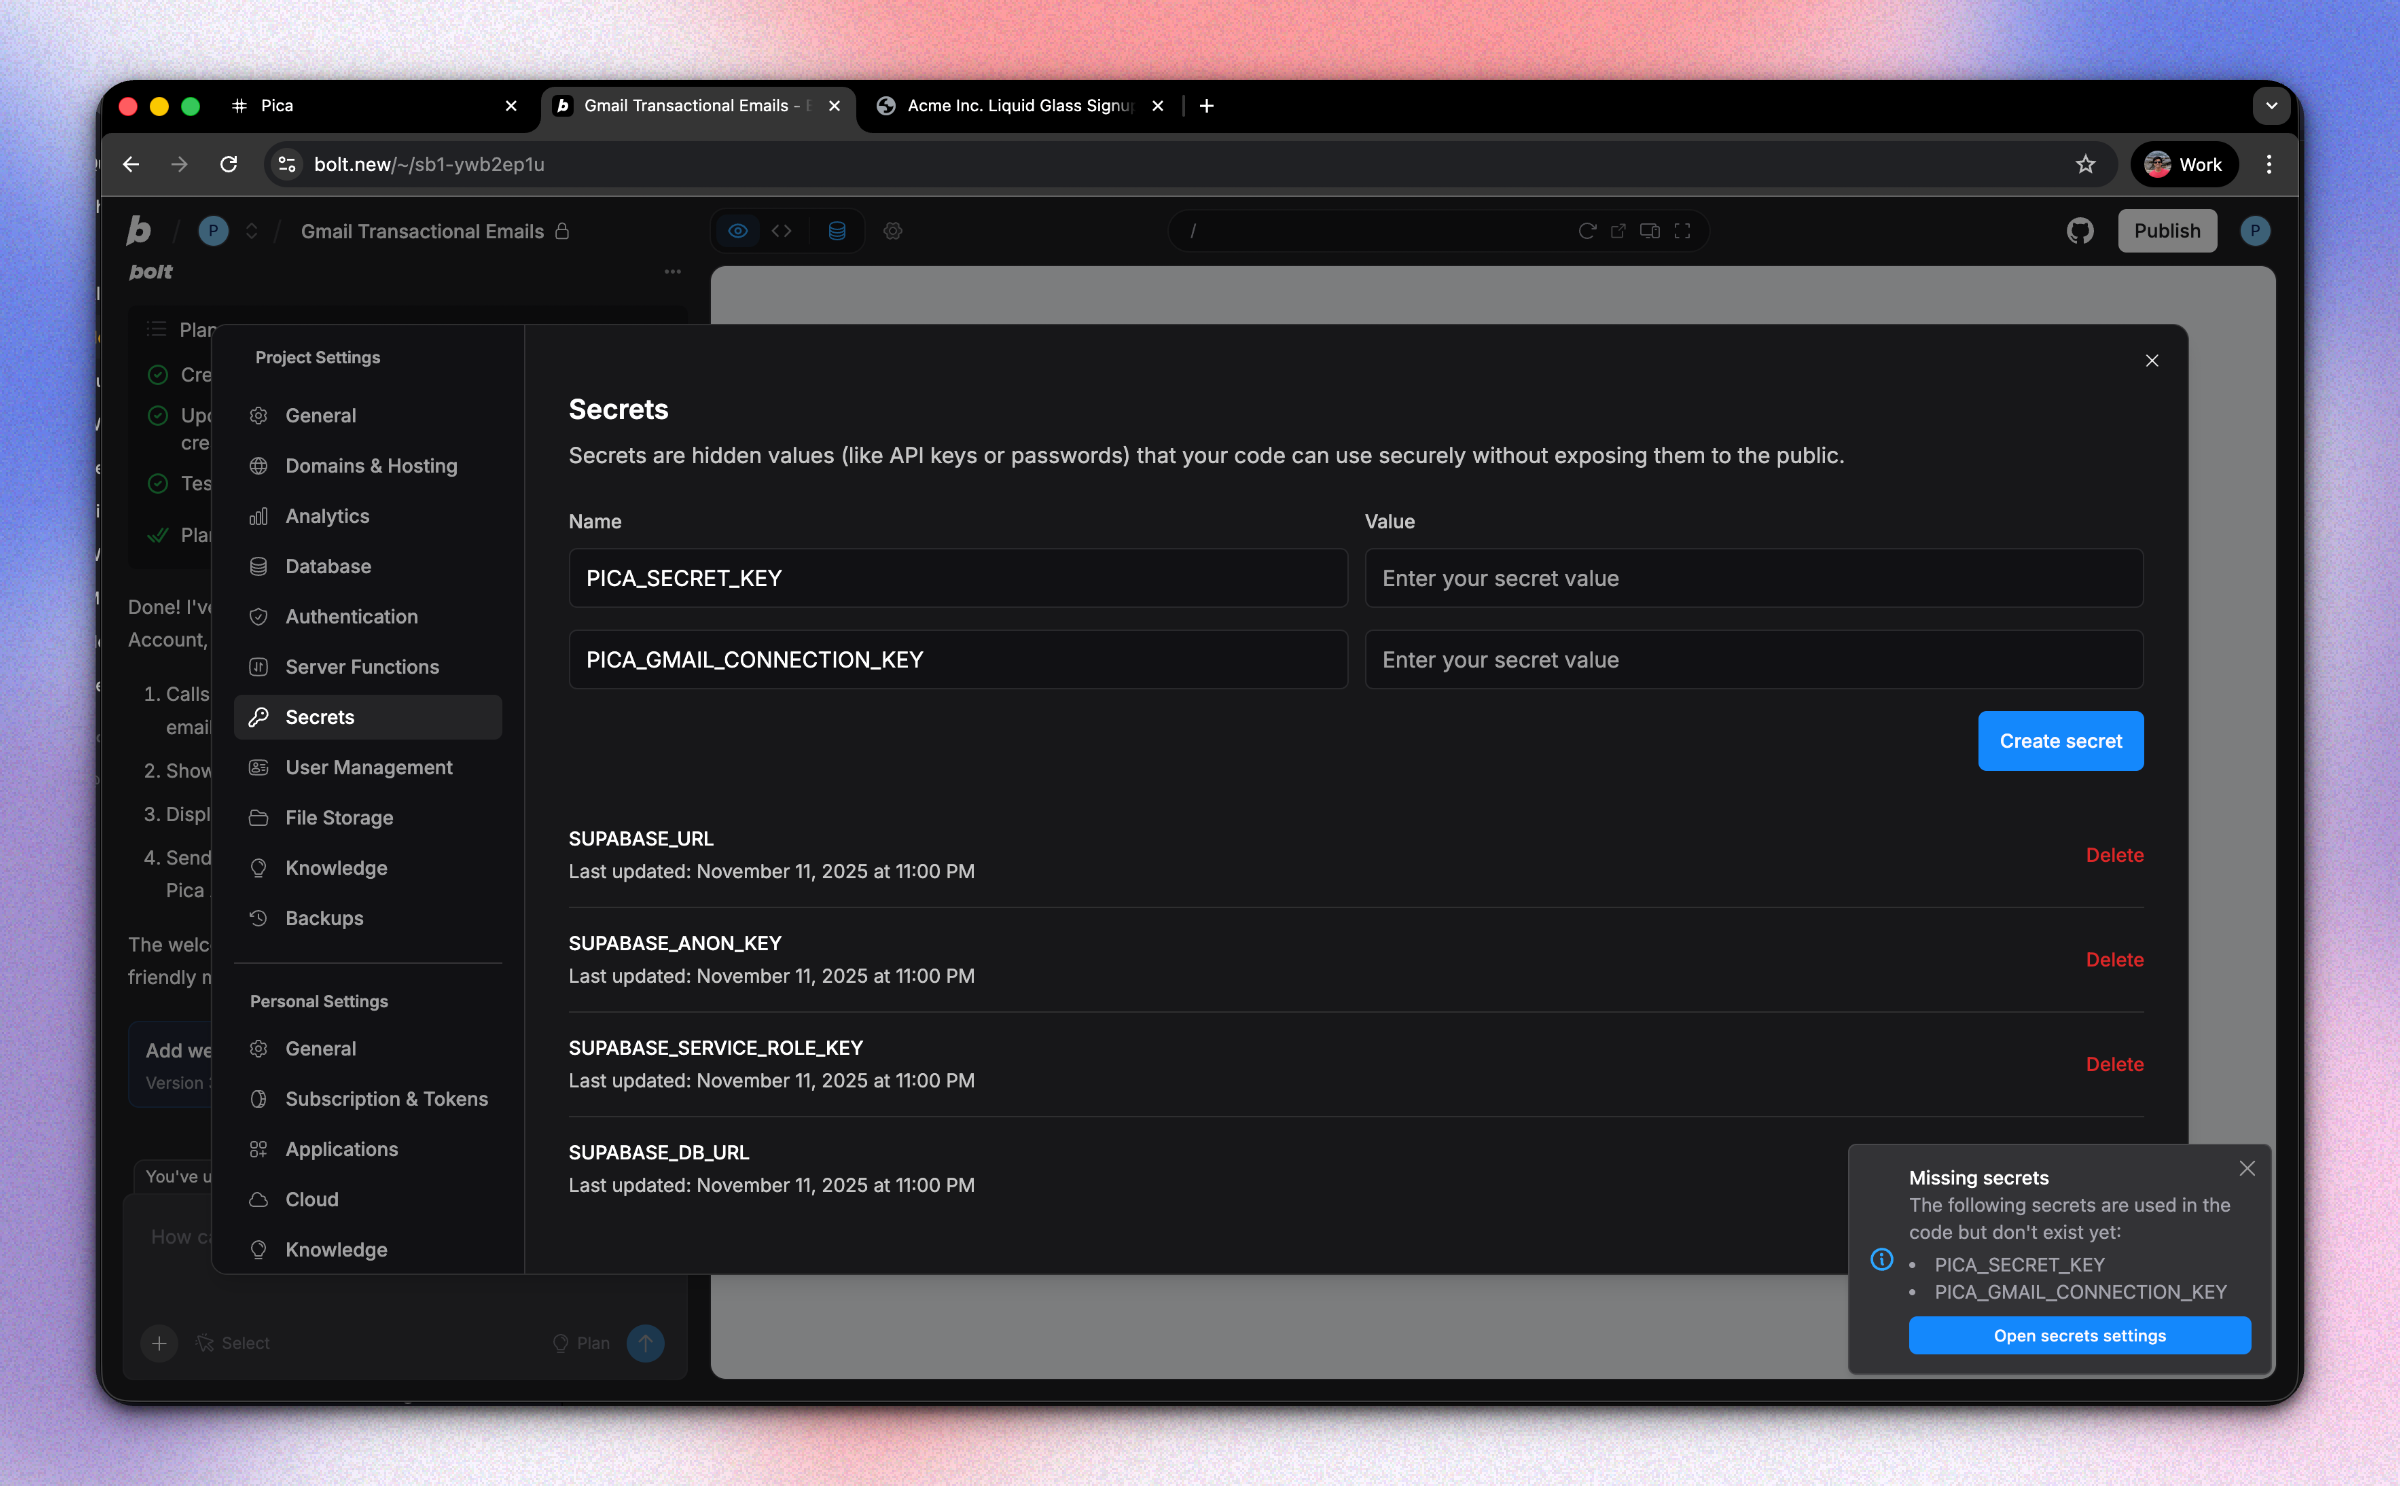
Required Environment Variables:
1. PICA_SECRET_KEY
- Get it from: app.picaos.com/settings/api-keys
- This authenticates your application with Pica
2. PICA_GMAIL_CONNECTION_KEY
- Get it from: app.picaos.com/connections
- This is the connection key you saved in Step 1
How to Add Secrets in Bolt:
- Click on the Settings icon in Bolt
- Navigate to Secrets
- Add both keys with their respective values
- Save and restart your application
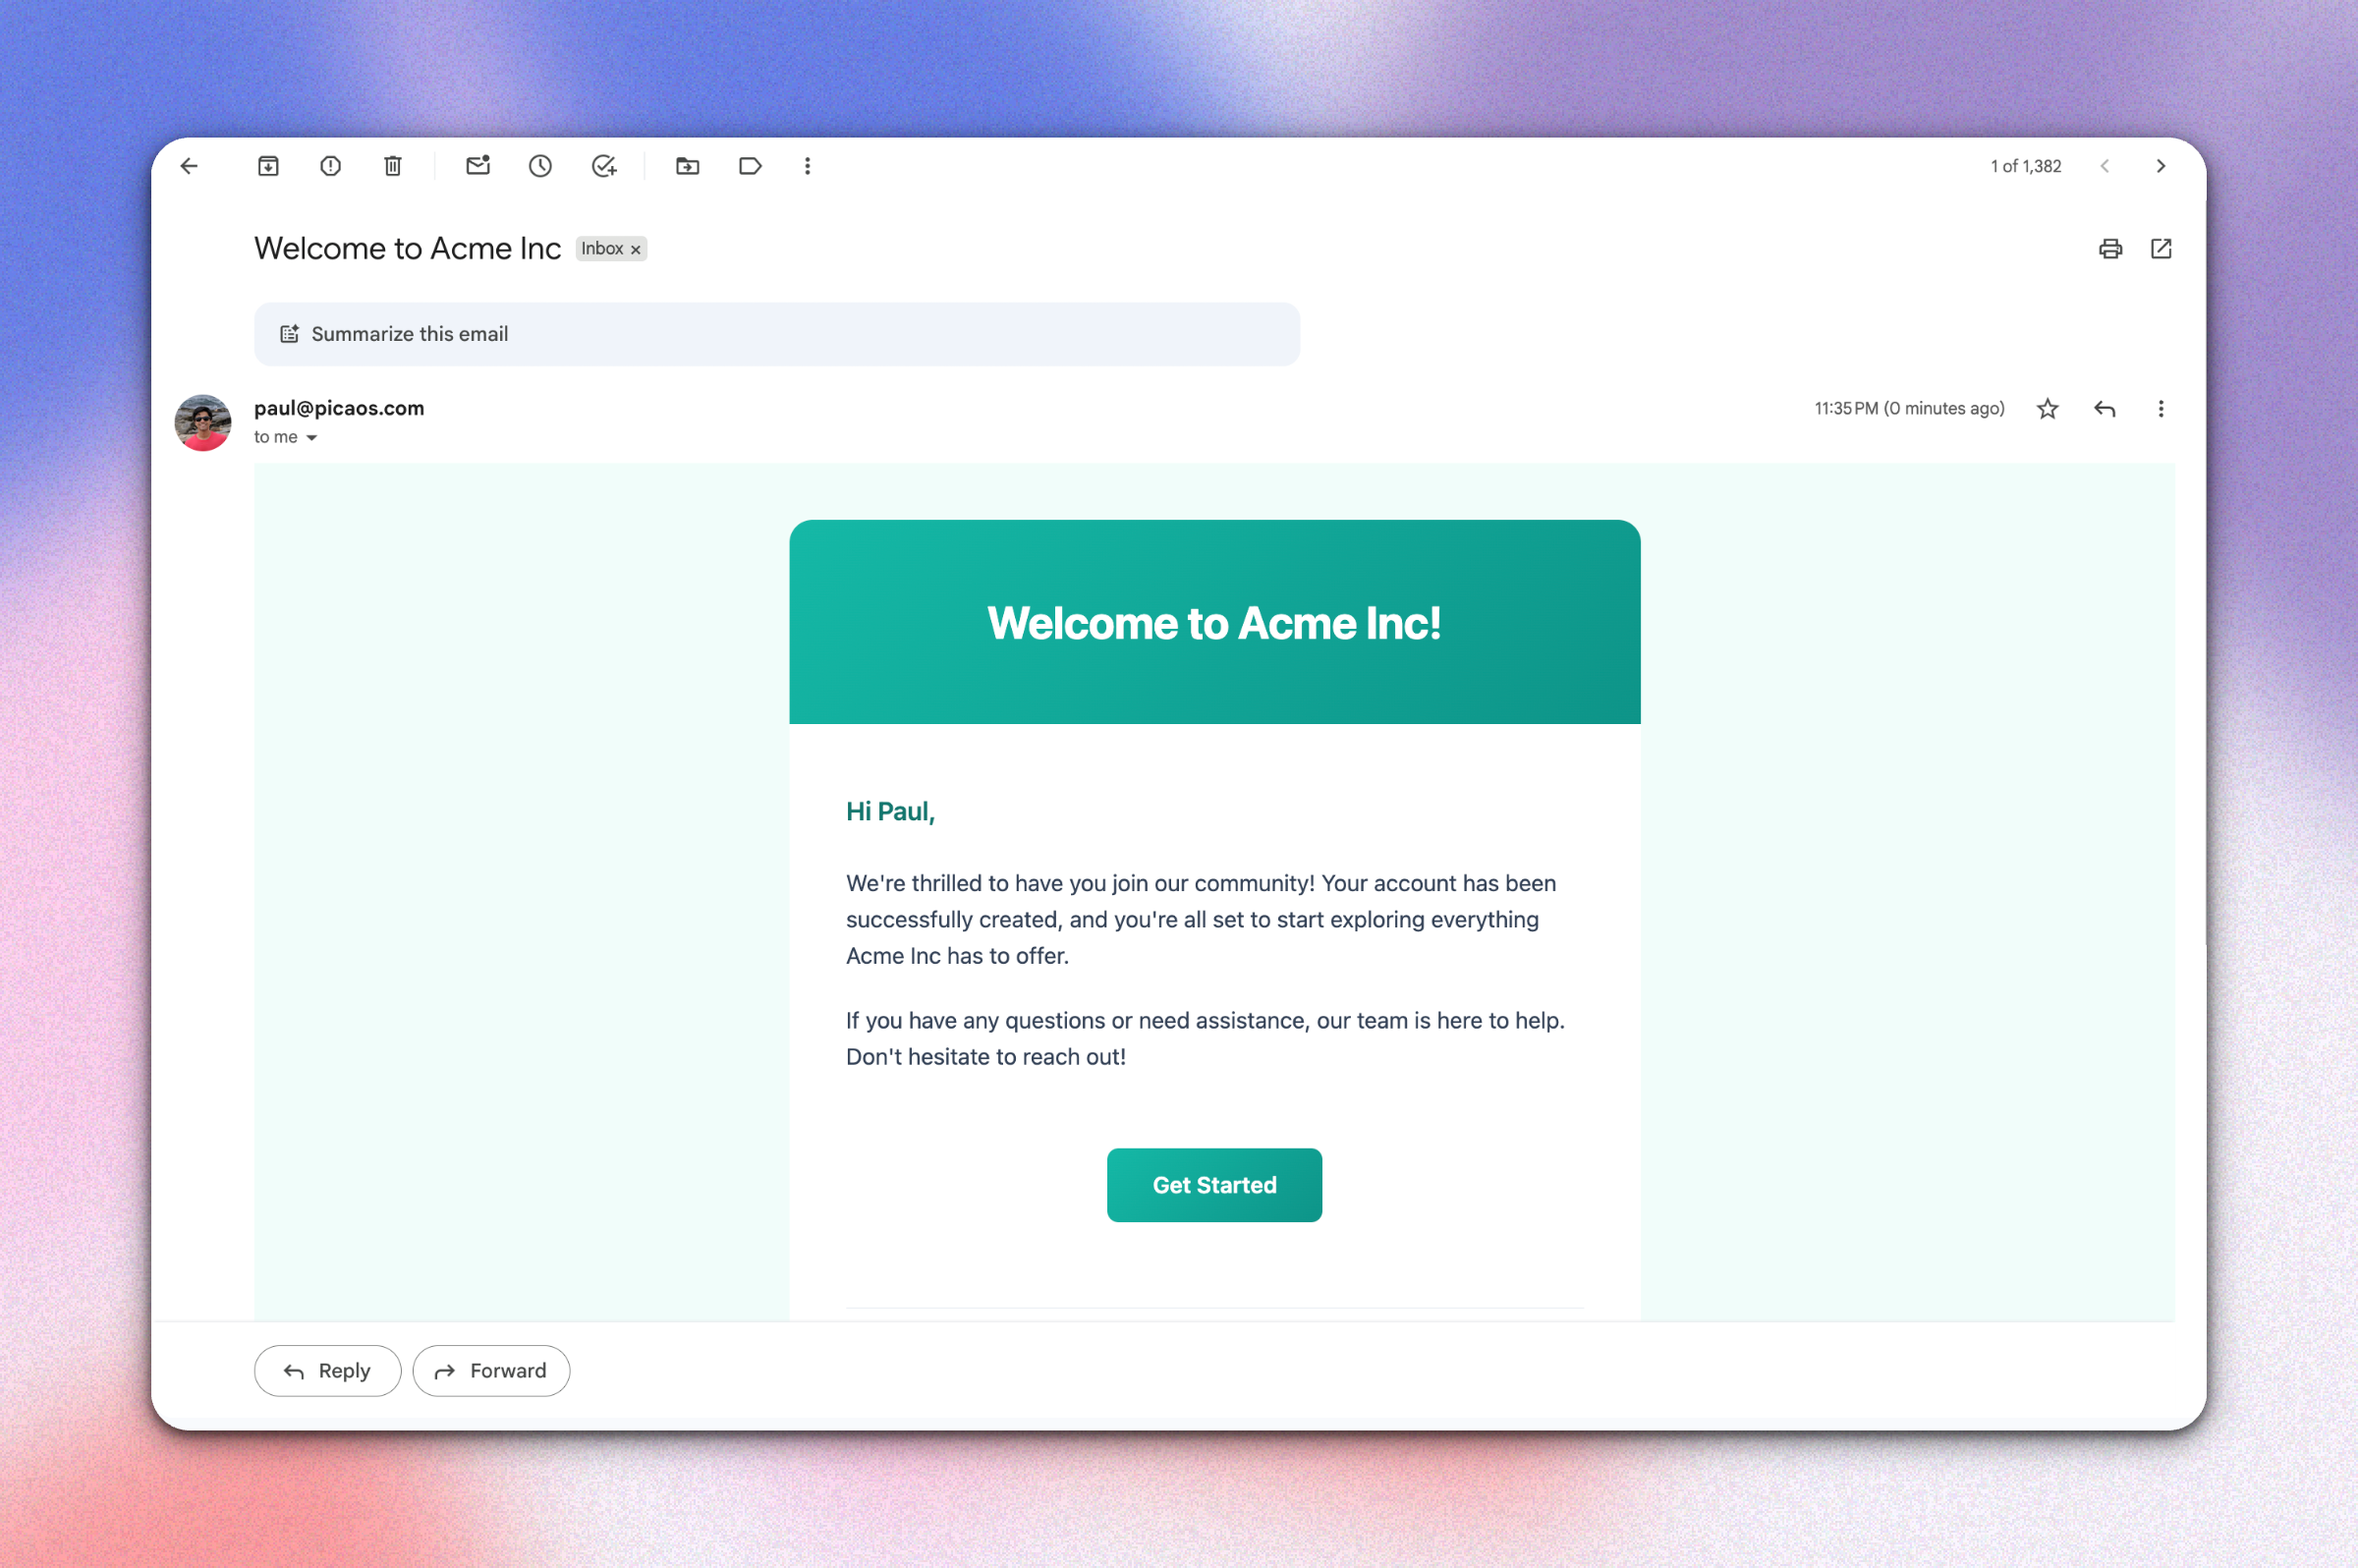
Step 4: Customize Your Email Design
Now that your backend is set up, you can customize your welcome email to match your brand! Bolt makes it easy to modify the email template with simple instructions.
Example Customization:
Try telling Bolt:
"I want you to update the design of my welcome email to match a turquoise blue theme"
Bolt will automatically update the HTML email template with your brand colors!
Troubleshooting
Emails Not Sending?
- Check your environment variables - Make sure both keys are set correctly in your Bolt secret settings
- Verify your Gmail connection - Go to app.picaos.com/connections and ensure it's active
- Check the Pica logs - View execution logs in your Pica dashboard
Conclusion
Congratulations! 🎉 You've just built a production-ready welcome email system in minutes. No complex SMTP configuration, no OAuth flows, no infrastructure headaches—just clean, working code.
Ready to add more integrations? Explore other Bolt use cases to supercharge your application with Pica.
Get Help
Questions or need support?
- 📅 Schedule a call with our team
- 📚 Check out the Pica documentation
- 🎥 Watch our video tutorials
Happy building! 🚀