


In this guide, we'll build a finance management app that uses AuthKit by Pica to enable your users to connect their own financial accounts—QuickBooks, Xero, and Stripe. With Bolt and Pica, you can create a production-ready multi-tenant finance app in minutes.
What You'll Build
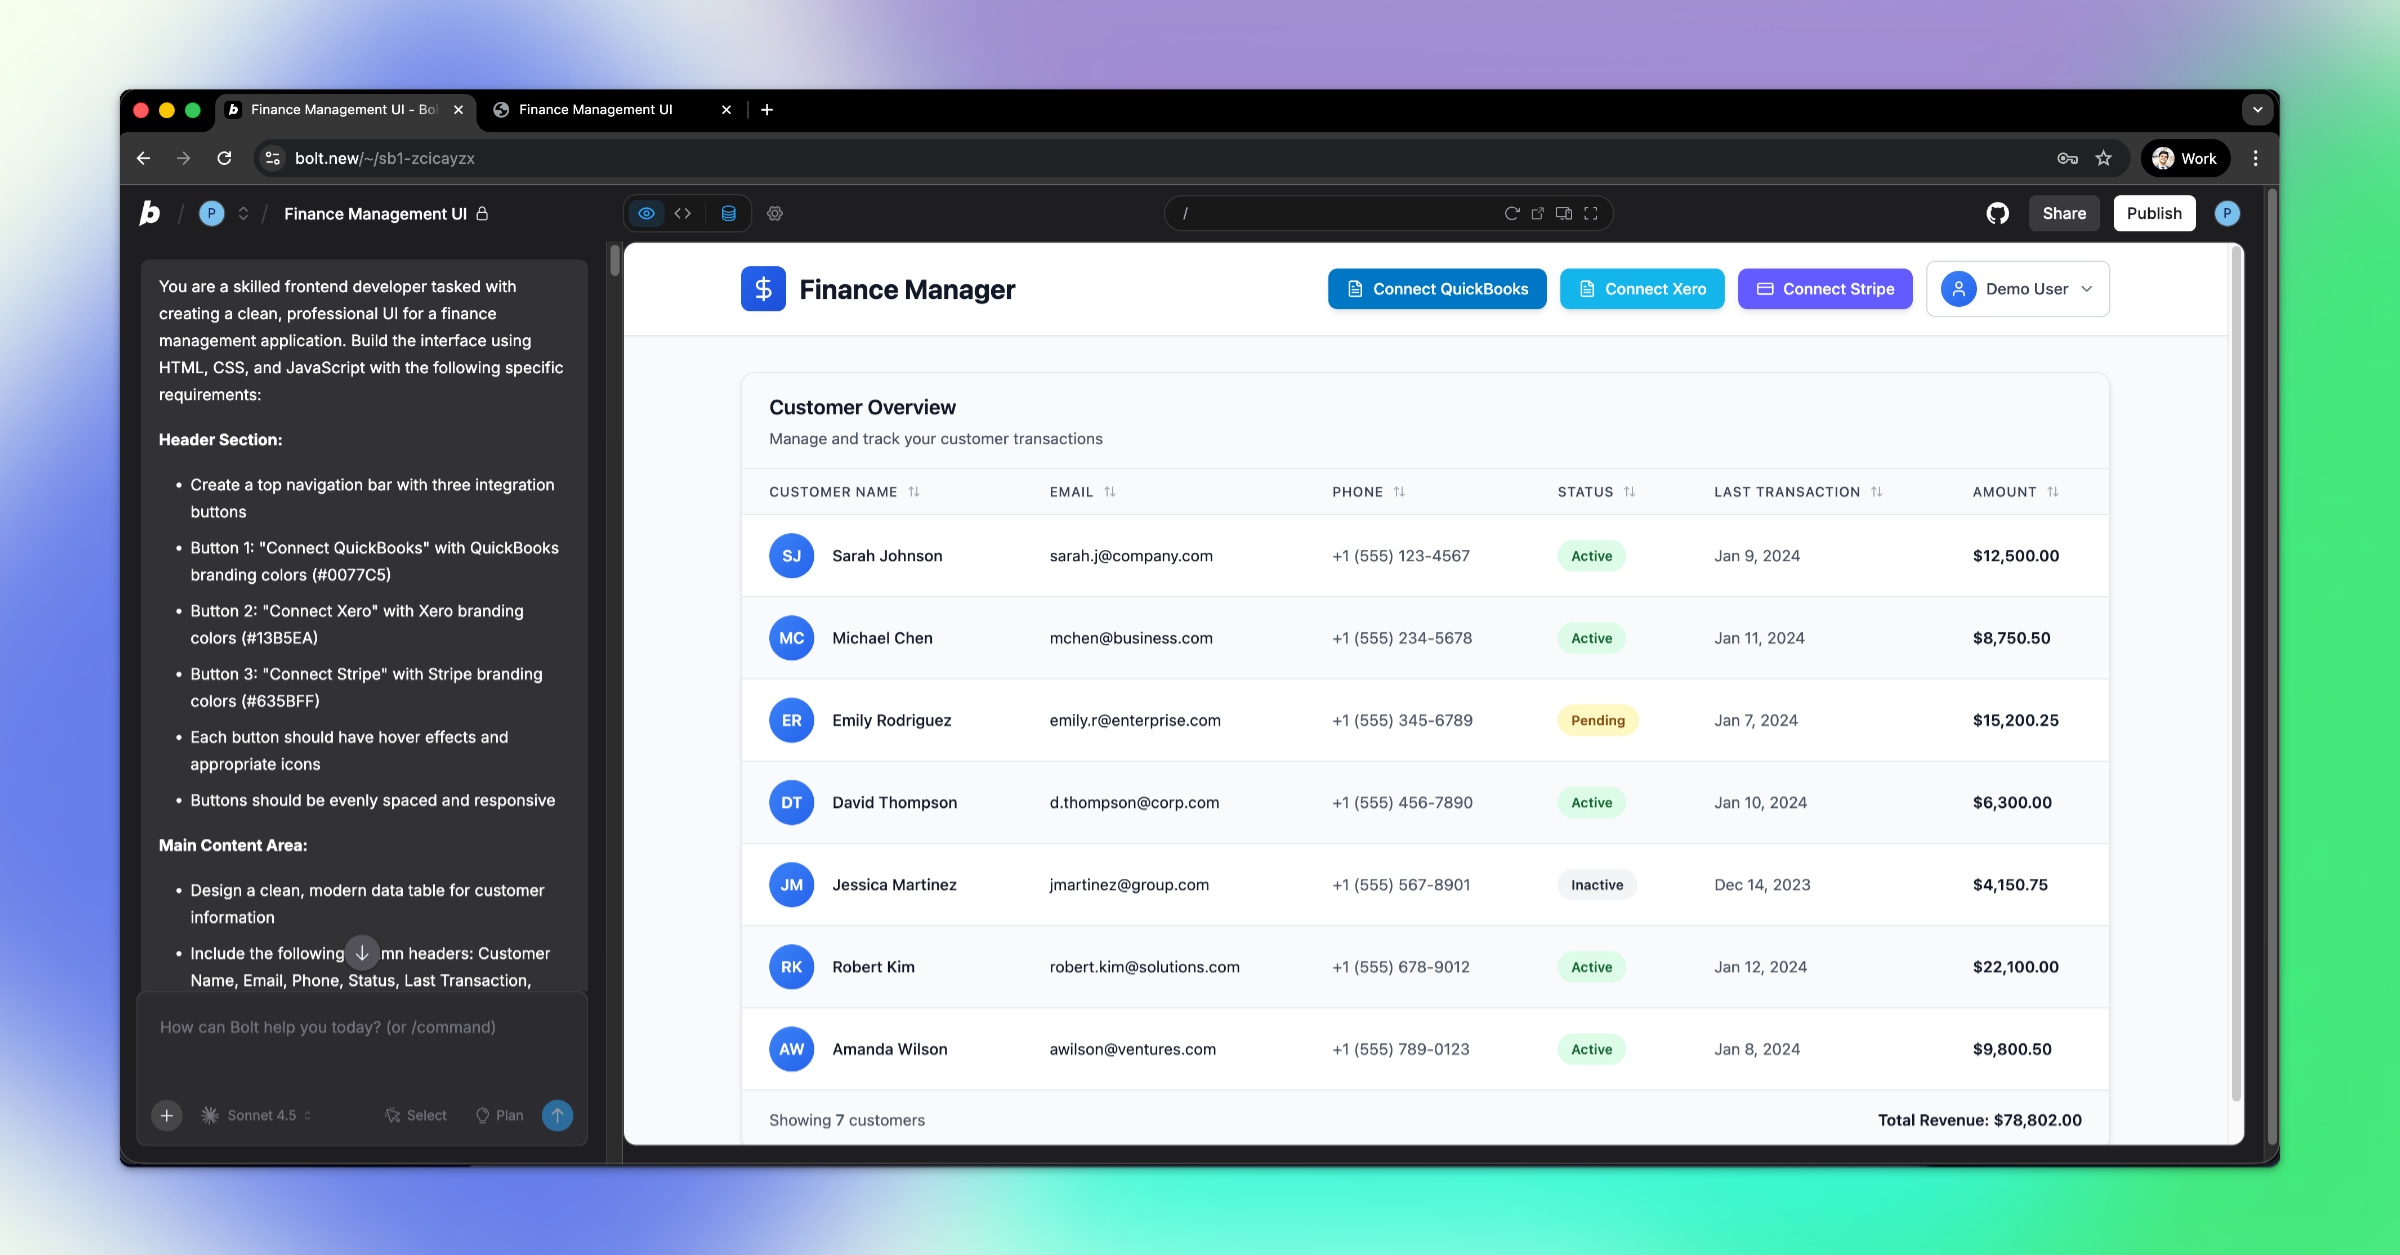
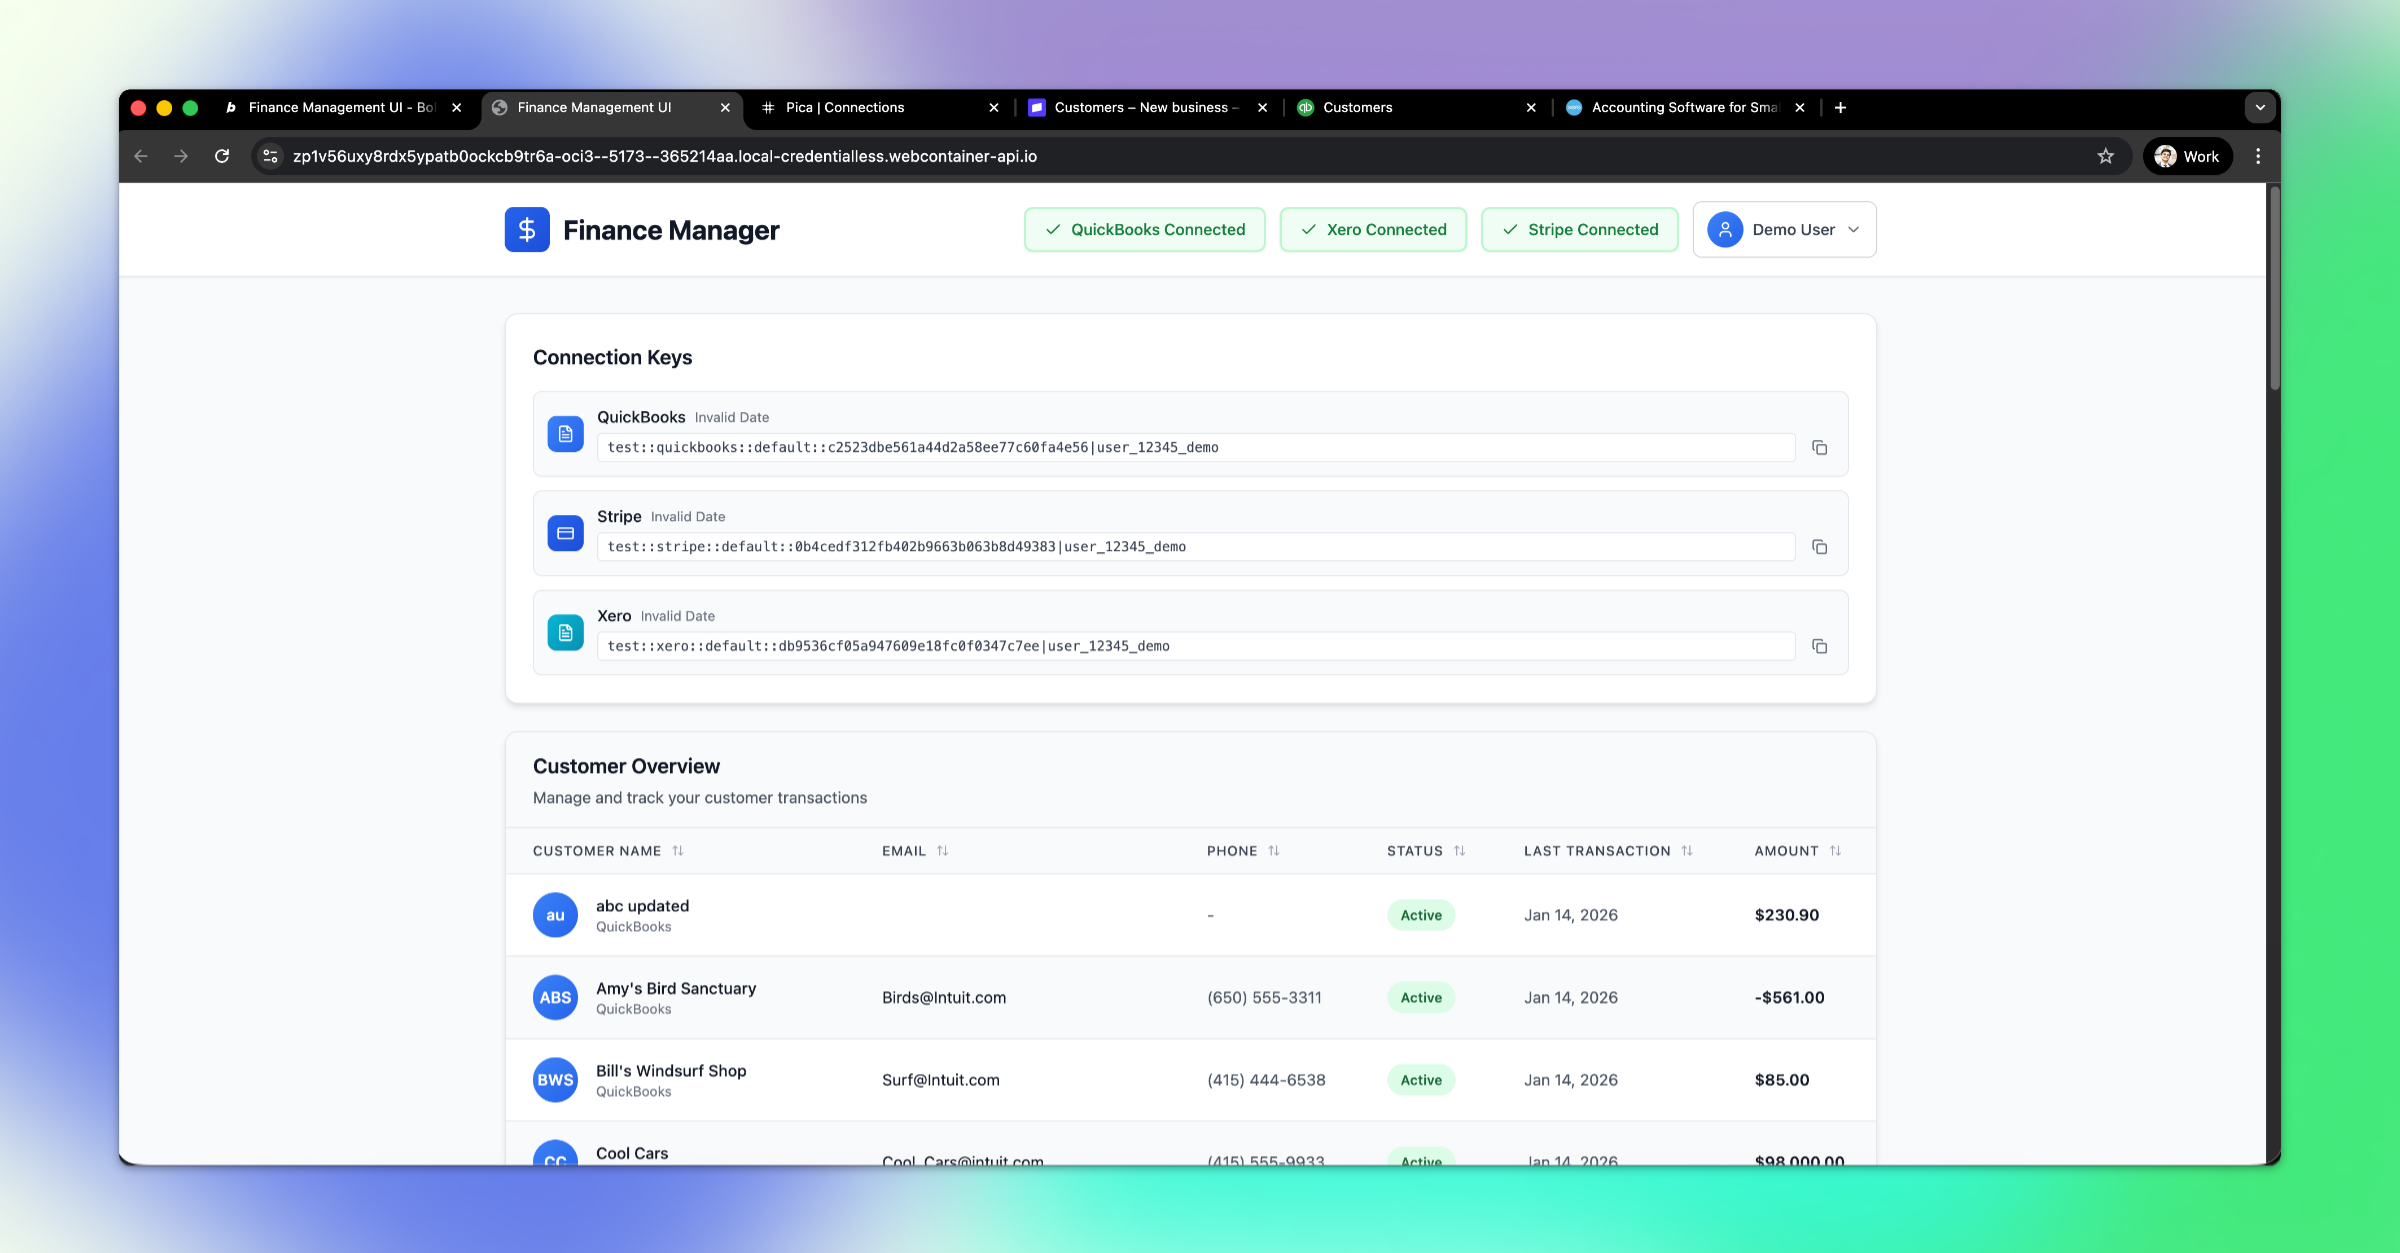
By the end of this tutorial, you'll have:
- A clean finance management dashboard with integration buttons
- AuthKit integration allowing users to connect their own accounts
- A customers table displaying data from connected integrations
- Support for QuickBooks, Xero, and Stripe connections
Let's get started! 🚀
Step 1: Build the Finance App UI
First, let's create the finance management interface with Bolt.
Prompt Bolt:
"Design a clean finance management app UI featuring three top-level integration buttons—QuickBooks, Xero, and Stripe—along with a table for displaying customer data. The focus should be on clarity and simplicity. Create a users table with the user ID visible in a profile dropdown."
💡 Pro tip: In Bolt, press the Enhance Prompt button before entering to get a more polished implementation.
Bolt will generate a complete finance dashboard with integration buttons and a data table.
Step 2: Add AuthKit to Your App
Now we'll integrate AuthKit to let users connect their own financial accounts.
🚀 Next step: Copy the prompt above and paste it into Bolt.new to add AuthKit to your app!
What This Does:
This prompt will set up:
- ✅ Backend token generation endpoint
- ✅ Frontend AuthKit integration
- ✅ User authentication with identity management
- ✅ Environment variable configuration
- ✅ Connection success/error handling
Chrome Local Development
If developing locally with Chrome, you may need to:
- Navigate to
chrome://flags - Search for "Local Network Access Checks"
- Set to Disabled
Testing AuthKit
💡 Important: To test AuthKit functionality, open your Bolt project in its own browser window (not in the Bolt editor preview). AuthKit requires a proper browser environment to handle OAuth flows and authentication properly.
Step 3: Configure Integration Buttons
Now let's update the app to support multiple integrations with the correct configuration.
🚀 Next step: Copy the prompt above and paste it into Bolt.new to configure your integration buttons!
Step 4: Add Your Secrets to Bolt
Once Bolt implements AuthKit, you'll need to add your API keys as environment variables.
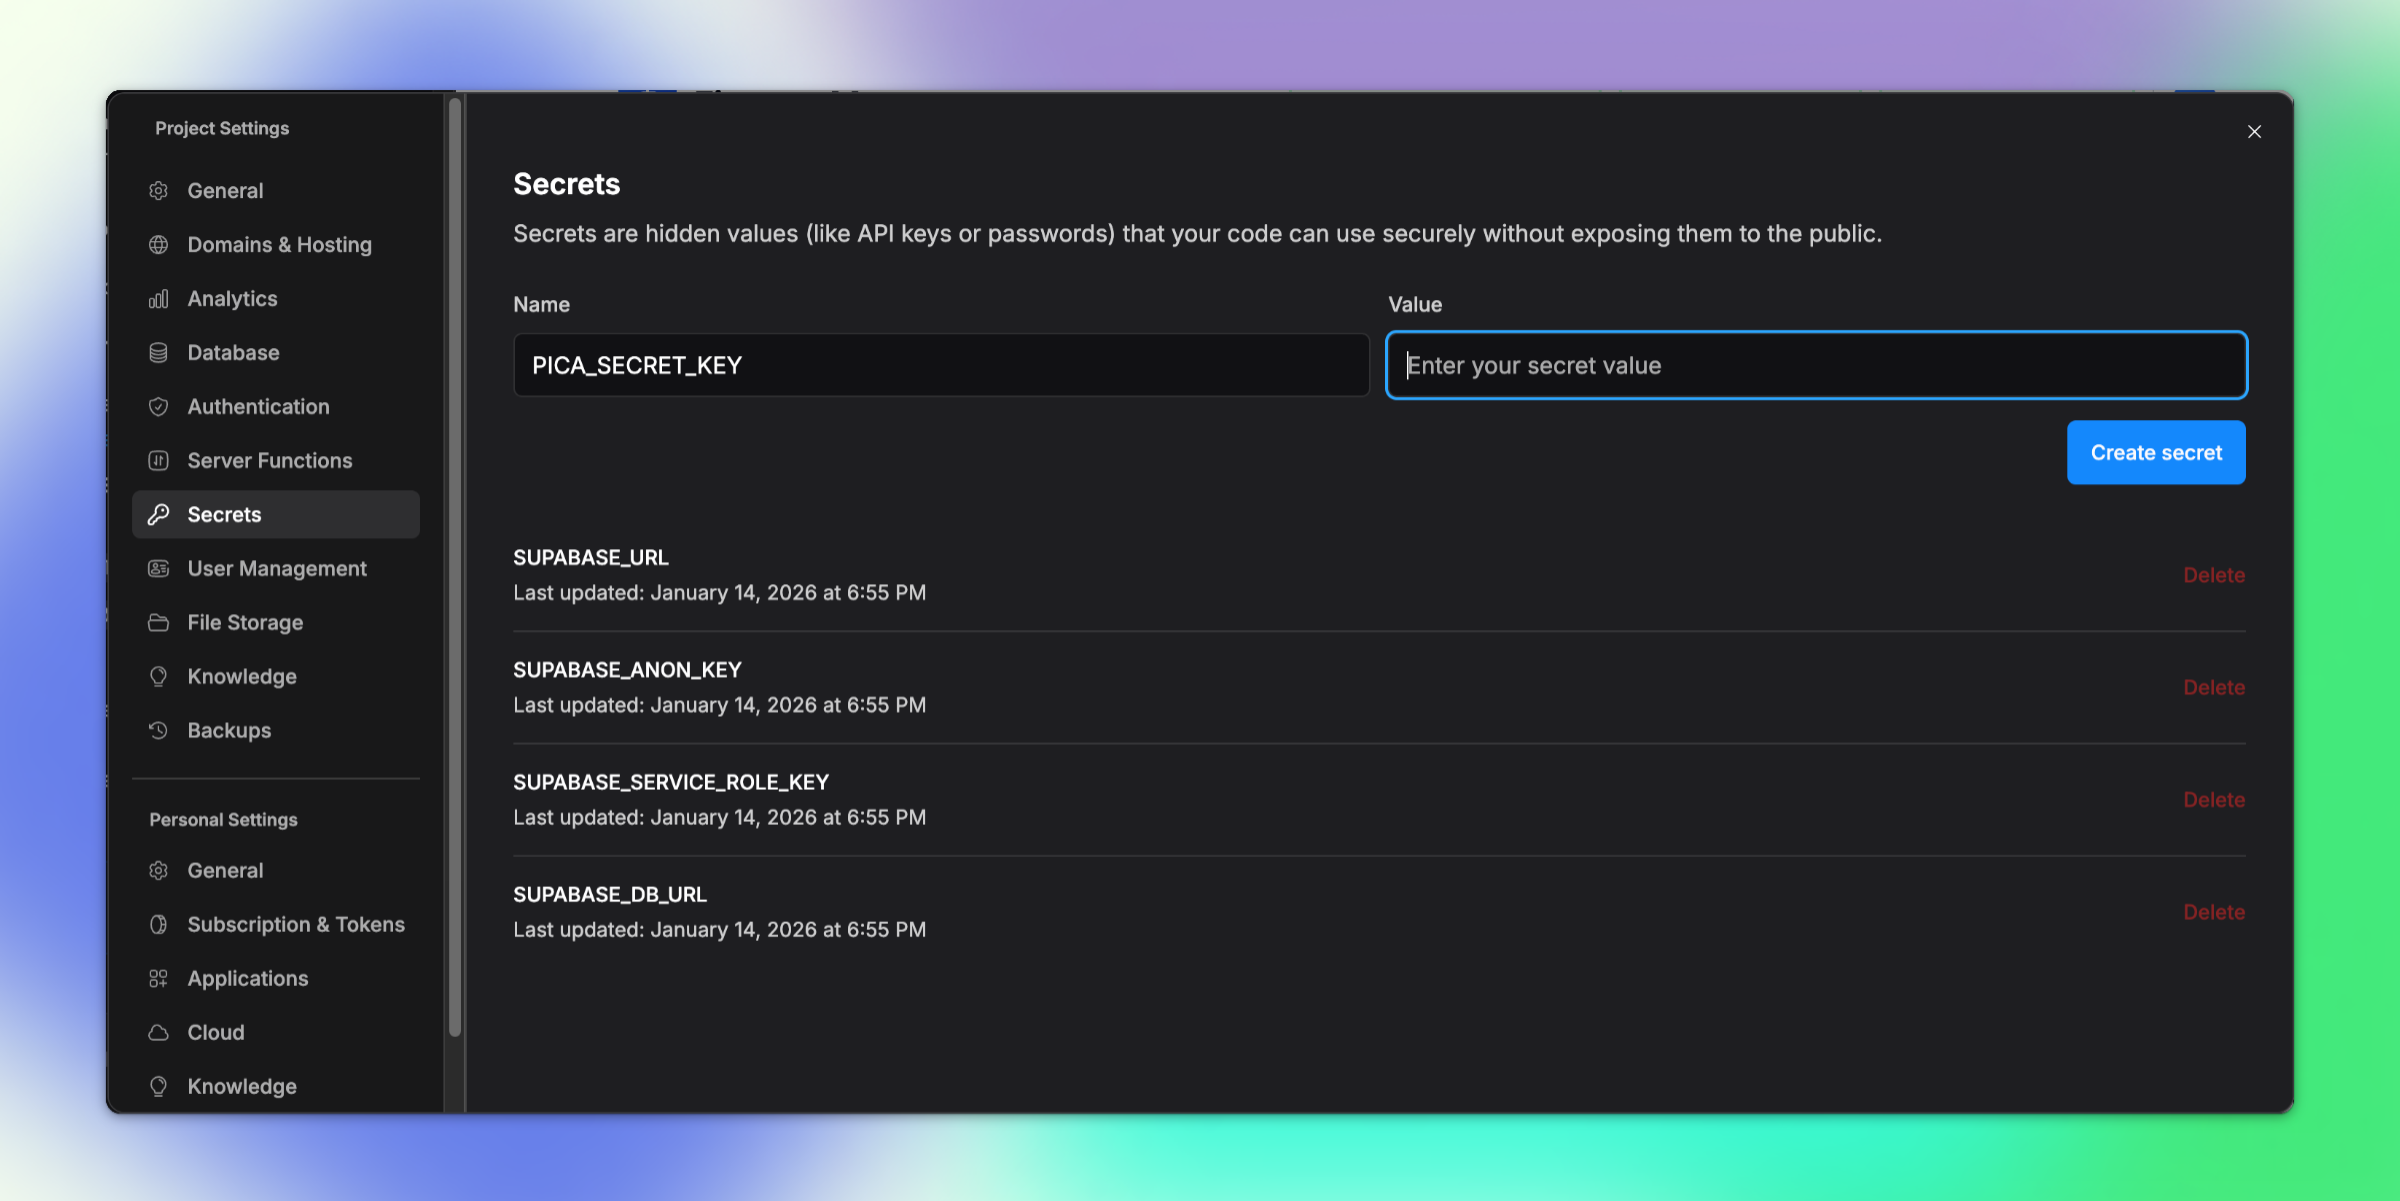
Required Environment Variables:
1. PICA_SECRET_KEY
- Get it from: app.picaos.com/settings/api-keys
- This authenticates your application with Pica
How to Add Secrets in Bolt:
- Click on the Settings icon in Bolt
- Navigate to Secrets
- Add your
PICA_SECRET_KEY - Save and restart your application
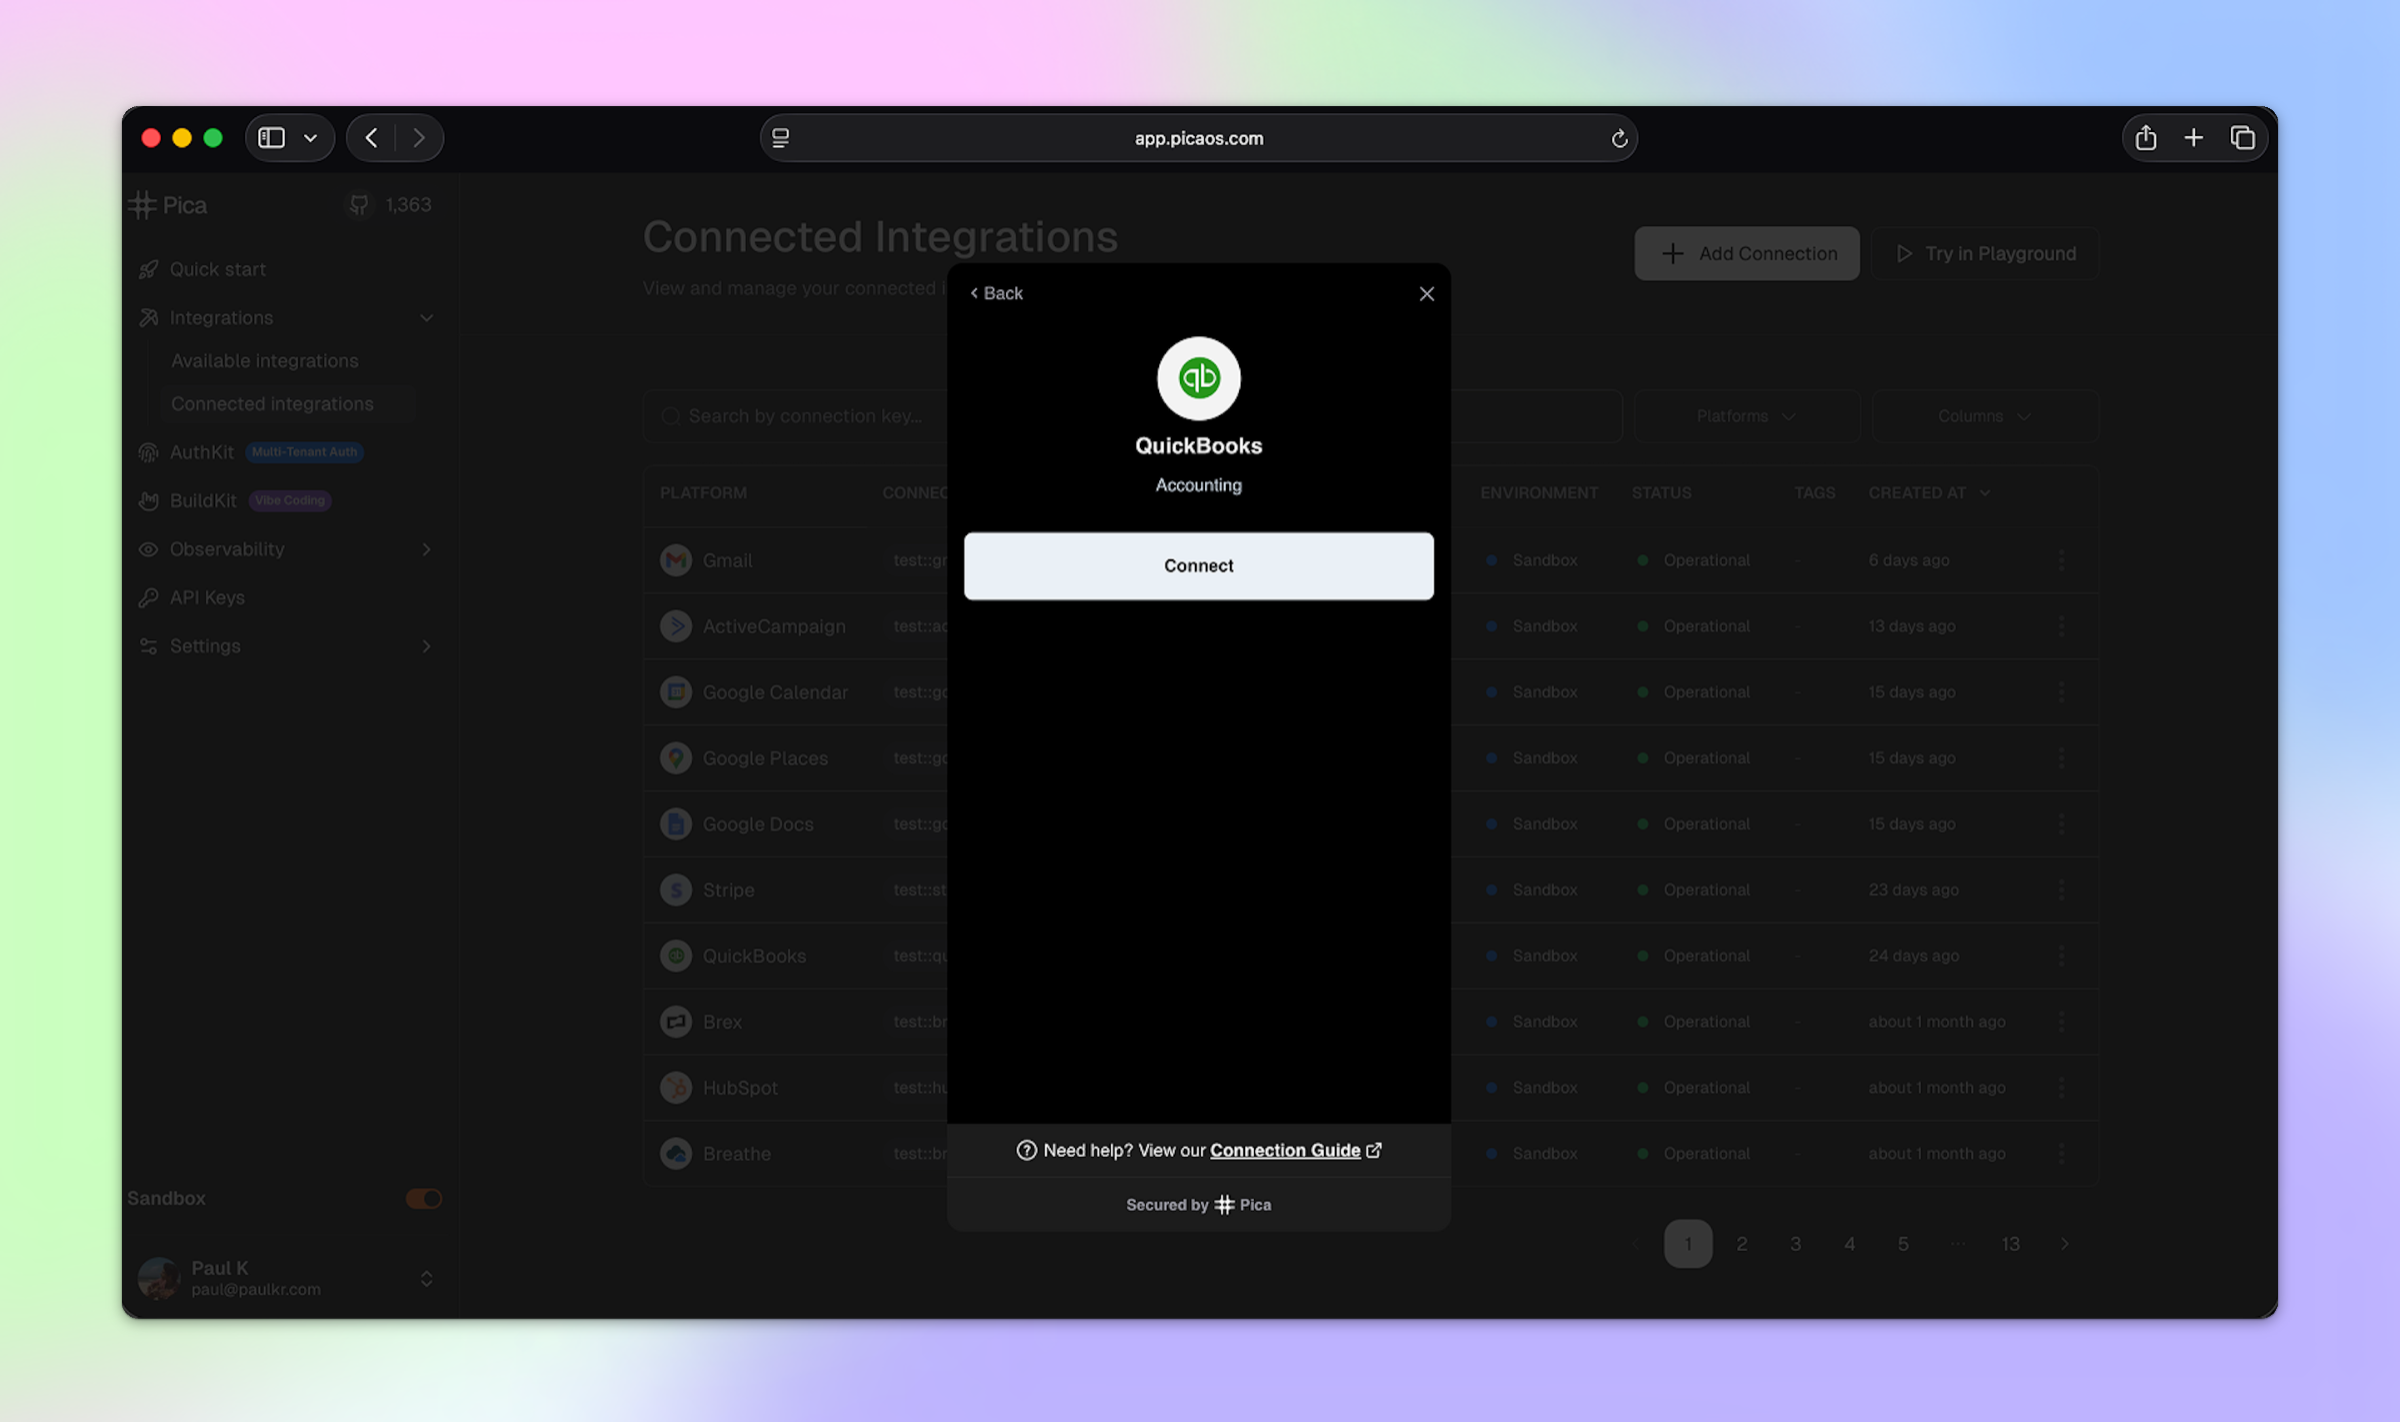
Step 5: Configure AuthKit in Pica
In the Pica Dashboard, you can manage the integrations visible in AuthKit and set their OAuth credentials.
For API Key-Based Integrations (Stripe):
If an integration is API Key based, like Stripe, you can simply enable it:

For OAuth Integrations (QuickBooks & Xero):
If an integration is OAuth type, like QuickBooks or Xero, you'll need to create your OAuth apps and set the client ID and secret:

Setting Up OAuth Apps:
For QuickBooks:
- Go to developer.intuit.com
- Create a new app and get your Client ID and Client Secret
- Set the redirect URI to:
https://app.picaos.com/connections/oauth/callback
For Xero:
- Go to developer.xero.com
- Create a new app and get your Client ID and Client Secret
- Set the redirect URI to:
https://app.picaos.com/connections/oauth/callback
Step 6: Generate Customer Fetch Logic with BuildKit
Now we'll use Pica BuildKit to generate the prompts for fetching customers from all three platforms.
Using BuildKit:
- Go to the BuildKit page at: app.picaos.com/buildkit
- Type: "Retrieve Contacts / Customers from Stripe, Quickbooks, and Xero"
- BuildKit will generate an optimized prompt for you
Or copy the prompt here:
🚀 Next step: Copy the prompt above and paste it into Bolt.new to create your customer fetching logic!
What BuildKit Does:
BuildKit automatically generates a prompt that includes:
- ✅ Proper API authentication setup for all three platforms
- ✅ Customer data fetching from QuickBooks, Xero, and Stripe
- ✅ Connection key management per user
- ✅ Error handling best practices
- ✅ Environment variable configuration
- ✅ Unified data display in your customers table
Step 7: Try It in Action!
Now when a user connects their financial integrations, you'll see customers from all their different accounts displayed in your table!
Test the Flow:
- Click on the QuickBooks, Xero, or Stripe button
- AuthKit modal opens for the user to authenticate
- User connects their account
- Customers from the connected account appear in the table
- Repeat for additional integrations to see unified customer data! 📊
Troubleshooting
AuthKit modal not opening?
- Check your environment variables - Make sure
PICA_SECRET_KEYis set correctly - Verify AuthKit configuration - Go to app.picaos.com/authkit and ensure integrations are enabled
- Check browser console - Look for any JavaScript errors
OAuth flow failing?
- Verify redirect URI - Make sure it's set to
https://app.picaos.com/connections/oauth/callback - Check OAuth credentials - Ensure Client ID and Secret are correct in Pica Dashboard
- Verify app permissions - Make sure your OAuth app has the necessary scopes
Customers not showing?
- Verify connection was saved - Check that the connection key is being stored
- Check user identity - Make sure you're filtering connections by the correct userId
- Check Pica logs - View execution logs in your Pica dashboard
- Verify API permissions - Ensure the connected account has customer data
Conclusion
Congratulations! 🎉 You've just built a multi-tenant finance management app that lets your users connect their own QuickBooks, Xero, and Stripe accounts. This is a powerful pattern for building SaaS applications that need to integrate with your users' existing tools.
What you can do next:
- Add support for more financial platforms (FreshBooks, Wave, etc.)
- Implement invoice syncing across platforms
- Build financial reporting dashboards
- Add payment processing through connected Stripe accounts
Ready to add more integrations? Explore other Bolt use cases to supercharge your application with Pica.
Get Help
Questions or need support?
- 📅 Schedule a call with our team
- 📚 Check out the Pica documentation
- 🎥 Watch our video tutorials
Happy building! 🚀